网站建设和wordpress 菜单结构
微信小程序 App 的生命周期钩子函数有以下 7 个:
- onLaunch(options):当小程序初始化完成时,会触发 onLaunch(全局只触发一次)。
- onShow(options):当小程序启动或从后台进入前台显示时,会触发 onShow。
- onHide():当小程序从前台进入后台时,会触发 onHide。
- onError(error):当小程序发生脚本错误或 API 调用失败时,会触发 onError 并带上错误信息。
- onPageNotFound(options):当小程序找不到页面时,会触发 onPageNotFound 并带上页面信息。
- onUnhandledRejection(reason):当 Promise 被 reject 且没有被 catch 处理时,会触发 onUnhandledRejection 事件,并带上 Promise 对象。
- onThemeChange(theme):当系统主题改变时触发。
其中,onLaunch、onShow 和 onHide 是小程序必备的生命周期函数,其他的是可选的。
在页面级别中,也有一些生命周期钩子函数,包括:
- onLoad(query):当页面加载时,会触发 onLoad,可以从 query 参数中获取页面参数。
- onReady():当页面初次渲染完成时,会触发 onReady。
- onShow():当页面被展示在前台时,会触发 onShow。
- onHide():当页面被隐藏在后台时,会触发 onHide。
- onUnload():当页面被销毁时,会触发 onUnload。
需要注意的是,页面级别的生命周期钩子函数只有在小程序中打开页面时才会触发,而在组件中使用时不会触发。
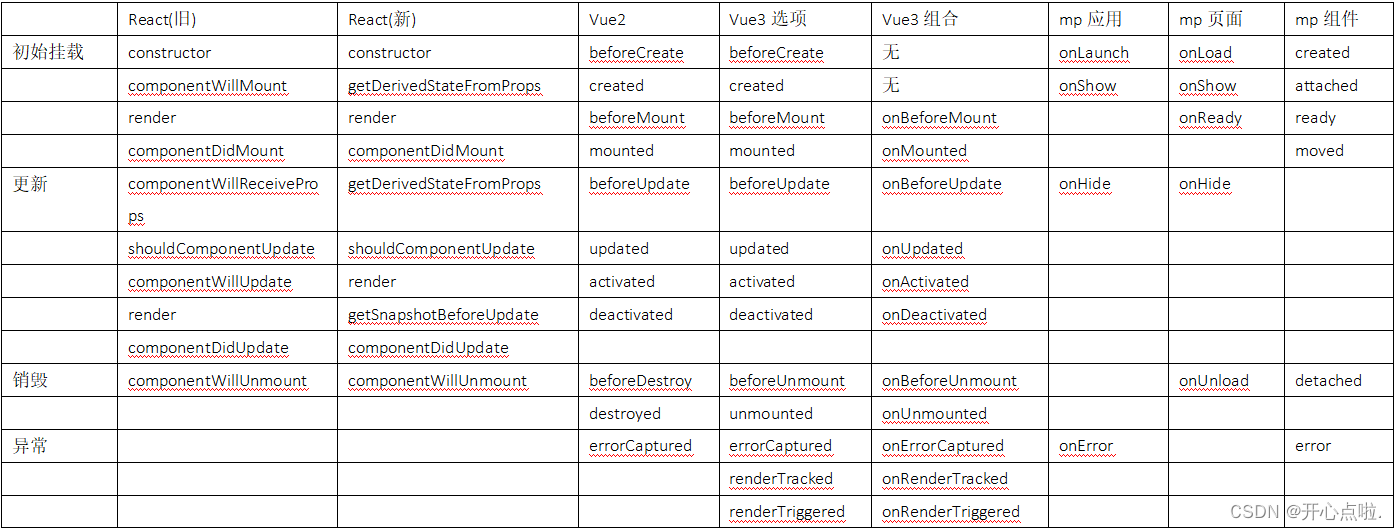
可以参考以下图片加深对钩子函数的理解: