成都网站维护多少钱做商业地产常用的网站
今天这篇完全是从两件事儿有感而发。
昨天在文印店,在复印机上看到装订好的几页纸,我瞥了一眼,是历史知识点:
隋朝大运河分为四段,分别是___ ___ ___ ___,连接了五大河___ ___ ___ ___ ___
___ 年,隋炀帝在江都被部将杀死,隋朝灭亡。
科举制度在我国历史上存在了___年
......
全是类似这样的东西,我心想,都什么年代了,怎么还在考这种死记硬背的东西?
中午吃饭的时候,又得知附近小区有个小学生又一次离家出走了,原因是父母逼着他背大量的唐诗宋词,逼着他学奥数.....
这两件事儿让我立刻联想到了最近爆红的ChatGPT,它本身就是一个拥有海量知识的数据库,上面这些知识对它来说就是小菜一碟,可以精准回答。
不仅如此,它还能在几秒钟内为诸如“罗密欧与朱丽叶是一部好戏吗?”或“谁是加拿大最重要的总理?”等问题写出“深思熟虑”的文章,老师都无法分辨是不是学生写的。
现在ChatGPT已经很厉害了,将来AI如果发展到更高程度,哪些工作会被干掉?
我们现在这种不顾孩子的兴趣,死记硬背,填鸭式、疯狂刷题式教育出来的学生,将来如何面对人工智能的挑战?
别的领域不敢妄谈,主要说说我熟悉的软件开发领域。
我之前也写过一篇文章《ChatGPT强悍的编程能力,让我吓出一身冷汗!》,大家可以看一看。
越是通用的,结构越清晰的东西,基于海量数据的ChatGPT展示出的能力就越强。比如实现通用的功能,发起一次RPC,读写文件,压缩文件,生成缩略图......,码农经常刷的算法等等。
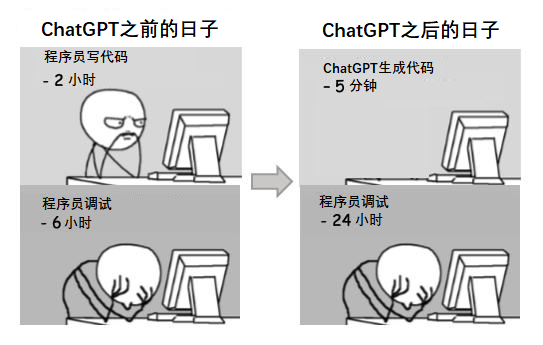
ChatGPT能通过Google低级别工程师面试重复说明了这一点,这种能力让它成为程序员编程的好帮手,需要小心的是它写出的代码得仔细鉴别,看看是不是自己需要的,花费的调试时间弄不好比自己写更长,更累。
但是主要靠“背诵”的ChatGPT无法取代程序员的设计能力,对于一个全新的业务需求,高级的开发人员可以对功能性和非功能性需求进行分析,然后决定:这个系统需要做冷热分离,查询分离,需要使用ES,Hbase等软件......
这种事情,ChatGPT干不了,它没见过这个需求,理解不了,找不到答案。
当然,如果这个案例被它学习到了,以后可能会给别人“背诵”答案,就像我之前文章中的“薪水支付案例”一样,但是老板十有八九是不敢使用的。
舒己怀博士说,一个工程师所具备的重要的能力包括:
1.在问题没有明显的结构的时候,能看到其内在的结构和关联;
2.在各种制约的限制下,能够找到综合满足或优化的可能与框架;
3.能够心怀不同的想法,做过比较和判断。
这种能力和我上面说的设计能力是一致的,也是AI不具备的。
“如果一个人被培养成了工具,没法建立问题的结构,那么他的价值就会大幅度缩水,反之价值仍然是巨大的。”
如果你所从事的工作技能越单一,或结构越清晰化,你的技能或工作被替代的可能性就会大一些。
比如CRUD的工作,给你一个数据库表,生成对它的增删改查相关的代码,太清晰,结构太简单,太容易被人工智能替代。
ChatGPT没有创造力,比如你要是问它面向对象的设计原则是什么?它能把SOLID回答得头头是道,但是它永远无法独自总结出SOLID原则,也无法总结出各种设计模式。
ChatGPT不会把厕所和串串联系在一起,也不会把CPU和阿甘,把TCP/IP和大明邮差联系在一起,这是人类的突发奇想,ChatGPT给不了我们。
你让ChatGPT描述一段美丽的风景,它几秒之内可以从海量数据中轻松给你来一段,你让它写一个情节连贯,风格一致,逻辑自洽的长篇小说例如《三体》,它搞不定,因为它缺乏想象力。
现在大家明白我想说的意思了,ChatGPT在在结构清晰的,通用的领域,能力极强,远超人类,在需要发挥创造力、想象力的领域,它就远远不如人类了。
此外,也不必过分担心ChatGPT,虽然它必将会对我们的生活和工作带来冲击,但冲击肯定不是猛然发生的,而是润物细无声,慢慢渗入。它自身也需要演化,迭代,基于它的产品也需要找到合适的应用场景,诞生杀手级应用。
回到孩子教育的问题,在人工智能时代,少折腾孩子,别再花费大量时间去灌输那些孩子根本不喜欢的东西,多想想如何发展孩子的创造力,想象力吧!
(完)
点击下方图片,查看更多精彩