唐山建设网站建站免费建靓号网站
非类型模板参数
模板参数有类型形参和非类型形参;
类型形参:使用typename或者class修饰的参数类型名称
非类型形参:一个普通常量作为模板参数形参,不能为浮点数,字符类型以及类对象;
#include<iostream>
using namespace std;template<class T, size_t N = 64>
class test {private:T data = 10;
public:void print(){cout << data << endl << N << endl;}};int main()
{test<int> a;a.print();return 0;
}
上面的代码中,T就是典型的类型形参,N为非类型形参,这个N我们在类函数成员中可以直接使用
模板的特化
我们都知道,使用模板能够很方便的做出能够适应各种场景的函数,比如比较大小,加减法等函数:
template<class T>
bool Less(T a, T b)
{return a <  b;
}int main()
{cout << Less(1, 2) << endl;Date a(2022, 7, 8);Date b(2022, 7, 7);cout << Less(a, b)<< endl;return 0;
}
比如这样,就能够比较 int,double 之类的类型,但是有时候我们的类型可能无法满足我们的需求
比如:

我们需要比较的是Date类中的日期大小,但是我们传 Date* 类型进行比较时;
却发现比较的结果实际上是按照地址的大小来进行比较的。
对于这种情况,就需要我们的函数模板的特化出场了;
函数模板特化的步骤
1.有一个基础的函数模板
2.有一个template关键字,后面跟着一个空的<>
3.函数名后跟着一个<>,尖括号中指定需要特化的类型
4.函数形参表必须和模板函数的基础参数类型完全相同,否则会报错
比如上面的 Less 模板函数如何特化?
template<class T>
bool Less(T a, T b)
{return a <  b;
}template<>
bool Less<Date*>(Date* a, Date* b)
{return *a < *b;
}
我们对比基础函数模板,我们发现,特化的函数模板不仅template后面跟着空的 <> ,而且函数名后还有一个 <> ,并且里面有特化的类型,且形参名都是相同的;
这样我们就能够顺利比较 Date* 类型的参数了;

即然有函数的模板特化,那么就有类的模板特化
类的模板特化和函数的模板特化的规则类似。
类的模板特化
类的模板特化分为两种——全特化和偏特化;
我们先了解简单的全特化
全特化
template<class T1,class T2>
class Test {
public:Test(){cout << "Test(T1,T2)" << endl;}private:T1 a;T2 b;
};template<>
class Test<char, char> {
public:Test(){cout << "Test(char,char)" << endl;}
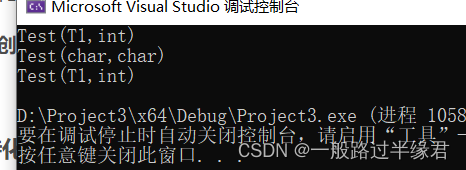
};int main()
{Test<int, int> t1;Test<char, char> t2;return 0;
}
全特化和函数特化一样,需要有基础的类模板,并且还得有其他一些条件才能实现特化;
若是创建的类对象和特化的类型一致,就会使用特化的类;
偏特化
所谓偏特化就是指这个类并非全都是指定一个类型,而是有特化有没特化的。
template<class T1>
class Test<T1, int> {
public:Test(){cout << "Test(T1,int)" << endl;}
};
就比如这个,我们指定特化第二个参数是 int 类型的,因此若是后面使用 int 类型当做第二个模板参数,就会使用这个类型;
int main()
{Test<int, int> t1;Test<char, char> t2;Test<char, int> t3;return 0;
}
而偏特化里面还有一个更特殊的——针对模板参数进一步条件限制设计出来的特化版本
这个和普通的偏特化不同,它的规则不同,我们先来看看实例;
template<class T1,class T2>
class Test<T1&, T2&> {
public:Test(){cout << "Test(T1&,T2&)" << endl;}
};
我们发现,它的template后不是跟着空 <>,其内部有正常的模板参数;
但是类名后面跟着不同指定特化的类型。
这就是进一步限制条件的特化版本。
模板特化应用示例
比如我们使用一个仿函数用来比较函数时,我们有时单纯靠模板无法满足需求,就需要特化版本来满足需求;
template<class T>
class Less {bool operator()(const T&x,const T& y)const {return x < y;}
比如这个,我们比较普通的类型无所谓,但是若是比较的是 Date* 的类型时,就会比较地址大小导致出错,因此需要特化。
template<>
class Less<Date*>
{bool operator()(const Date* x, const Date* y){return *x < *y;}
};
模板分离编译
当我们写模板类的时候需要注意一个点——模板类不能分离编译。
什么是分离编译?就是指模板函数或者模板类的函数声明和定义分别在不同的文件。
而模板函数和模板类的声明和定义在不同位置会导致出错。
这是因为编译器对于每个源文件都是独立编译的,若是分离编译则会导致源文件之间没有交互,导致对应的模板没有实例化,从而出错。
具体解决办法就是将声明定义放在一起,从而避免出错。