网站开发文档doc什么是公司主页
类接口 · TypeScript 入门教程 (xcatliu.com)
十四.类
① 类
- 类:定义了一件事物的抽象特点,包含它的属性和方法
- 对象:类的实例,通过new生成
- 面向对象(OOP)的三大特性:封装、继承、多态
- 封装(Encapsulation):将对数据的操作细节隐藏起来,只暴露对外的接口。外界调用端不需要(也不可能)知道细节,就能通过对外提供的接口来访问该对象,同时也保证了外界无法任意更改对象内部的数据
- 继承(Inheritance):子类继承父类,子类除了拥有父类的所有特性外,还有一些更具体的特性
- 多态(Polymorphism):由继承而产生了相关的不同的类,对同一个方法可以有不同的响应。比如
Cat和Dog都继承自Animal,但是分别实现了自己的eat方法。此时针对某一个实例,我们无需了解它是Cat还是Dog,就可以直接调用eat方法,程序会自动判断出来应该如何执行eat - 存取器(getter & setter):用以改变属性的读取和赋值行为
- 修饰符(Modifiers):修饰符是一些关键字,用于限定成员或类型的性质。比如
public表示公有属性或方法 - 抽象类(Abstract Class):抽象类是供其他类继承的基类,抽象类不允许被实例化。抽象类中的抽象方法必须在子类中被实现
- 接口(Interfaces):不同类之间公有的属性或方法,可以抽象成一个接口。接口可以被类实现(implements)。一个类只能继承自另一个类,但是可以实现多个接口
TypeScript中类的用法
- public:修饰的属性或方法是公有的,可以在任何地方被访问到,默认所有的属性和方法都是
public的 - private:修饰的属性或方法是私有的,不能在声明它的类的外部访问
- protected 修饰的属性或方法是受保护的,它和
private类似,区别是它在子类中也是允许被访问的
class Animal {public name;public constructor(name) {this.name = name;}
}let a = new Animal('Jack');
console.log(a.name); // Jack
a.name = 'Tom';
console.log(a.name); // Tom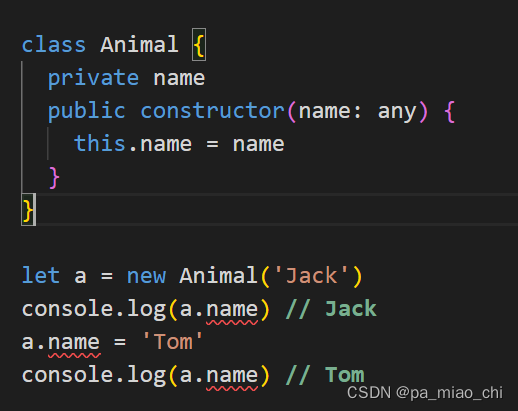
-
使用private修饰的属性或者方法,在子类中也是不允许访问的

-
protected 修饰的,允许在子类中访问
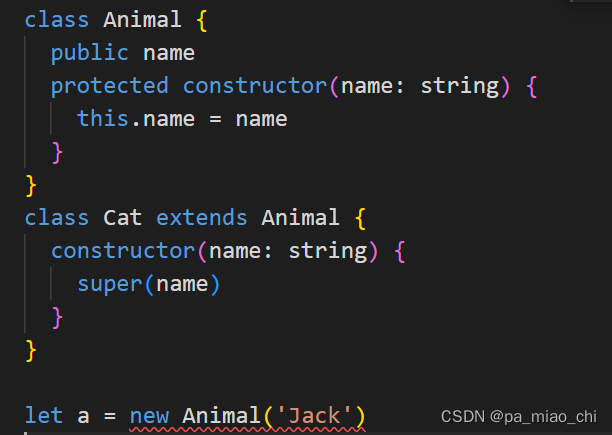
class Animal {protected namepublic constructor(name: string) {this.name = name}
}class Cat extends Animal {constructor(name: string) {super(name)console.log(this.name)}
}-
构造函数修饰为 private 时,该类不允许被继承或者实例化

-
当构造函数修饰为 protected 时,该类只允许被继承
参数属性
- 修饰符和readonly还可以使用在构造函数参数中,等同于类中定义该属性同时给该属性赋值,使代码更简洁
class Animal {// public name: string;public constructor(public name) {// this.name = name;}
}-
readonly : 只读属性关键字,只允许出现在属性声明或索引签名或构造函数中

- 如果 readonly 和其他访问修饰符同时存在的话,需要写在其后面
class Animal {// public readonly name;public constructor(public readonly name) {// this.name = name;}
}
抽象类
abstract 用于定义抽象类和其中的抽象方法
(1)抽象类是不允许被实例化的

(2) 抽象类中的抽象方法必须被子类实现
abstract class Animal {public namepublic constructor(name: string) {this.name = name}public abstract sayHi(): any
}class Cat extends Animal {public eat() {console.log(`${this.name} is eating.`)}public sayHi(): any {console.log(`Meow, My name is ${this.name}`)}
}let cat = new Cat('Tom')
十五.类与接口
① 接口可以对类的一部分行为进行描述
② 类实现接口
- 不同的类之间可以有一些共有的特性,就可以将这些特性提取为接口
- 使用 implements 关键字来实现
- 提高面对对象的灵活性
- 举例
门是一个类,防盗门是门的子类,如果防盗门有一个报警器的功能,可以给防盗门添加一个报警方法,如果有另一个类:车,也有报警器的功能,就可以考虑把报警器提取出来,作为一个接口,防盗门和门都去实现它
interface Alarm {alert(): void
}class Door {}class SecurityDoor extends Door implements Alarm {alert() {console.log('SecurityDoor alert')}
}class Car implements Alarm {alert() {console.log('Car alert')}
}- 一个类可以实现多个接口

③ 接口继承接口
- 接口与接口之间可以是继承关系
- 除了拥有alert方法以外,还拥有两个新方法
lightOn和lightOff
interface Alarm {alert(): void
}interface LightableAlarm extends Alarm {lightOn(): voidlightOff(): void
}
④ 接口继承类
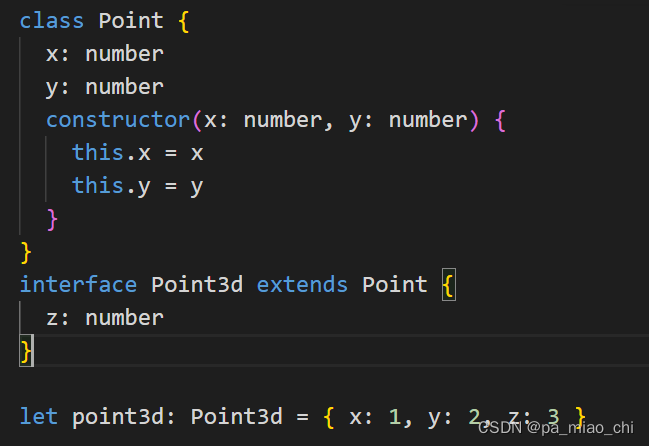
-
接口继承类的时候,只会继承它的实例属性和实例方法
十六.泛型
① 泛型的概念
- 泛型:定义函数,接口或类的时候,不预先指定具体的类型,而是在指定的时候再指定类型的一种特性
- 在函数名后面添加了<T>, 其中T用来指代任意输入的类型,在后面的输入value:T 和输出 Array<T> 中就可以使用了
function createArray<T>(length: number, value: T): Array<T> {let result: T[] = []for (let i = 0; i < length; i++) {result[i] = value}return result
}console.log(createArray<string>(3, 'x'))- 可以定义多个类型参数
function swap<T, U>(tuple: [T, U]): [U, T] {return [tuple[1], tuple[0]]
}console.log(swap([7, 'seven']))
② 泛型的约束
- 在函数内部使用泛型变量的时候,由于事先不知道它是哪种类型,所以不能随意的操作它的属性或者方法

-
可以对泛型进行约束,只允许这个函数传入那些包含length属性的变量,这就是泛型约束
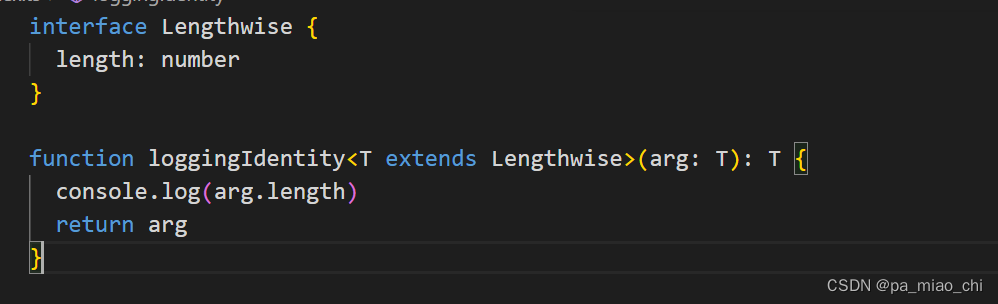

-
多个类型参数之间可以互相约束
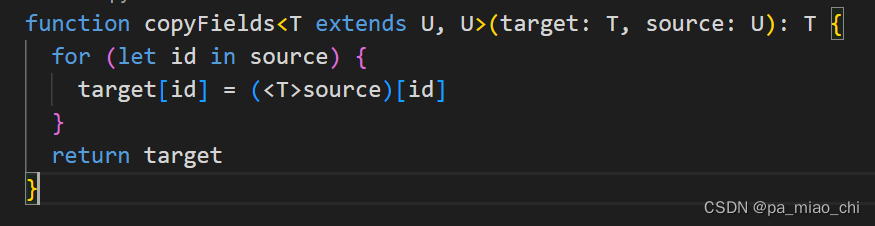
③ 泛型接口
interface CreateArrayFunc {<T>(length: number, value: T): Array<T>
}let createArr: CreateArrayFunc
createArr = function <T>(length: number, value: T): Array<T> {let result: T[] = []for (let i = 0; i < length; i++) {result[i] = value}return result
}console.log(createArr(3, 'x'))-
可以把泛型接口提前到接口名上

④ 泛型类: 泛型可以用于类的类型定义中
class GenericNumber<T> {zeroValue: Tadd: (x: T, y: T) => T
}let myGenericNumber = new GenericNumber<number>()
myGenericNumber.zeroValue = 0
myGenericNumber.add = function (x, y) {return x + y
}
⑤ 泛型参数的默认类型
TypeScript 2.3 之后,就可以为泛型中的类型参数指定默认类型,当使用泛型时,没有在代码中直接指定类型参数,从实际值参数中也无法推测出时,这个默认类型就会起作用

十七.声明合并
- 如果定义了两个相同名字的函数,接口或类,他们会合并成一个类型
① 函数的合并(重载)
function reverse(x: number): number;
function reverse(x: string): string;
function reverse(x: number | string): number | string {if (typeof x === 'number') {return Number(x.toString().split('').reverse().join(''));} else if (typeof x === 'string') {return x.split('').reverse().join('');}
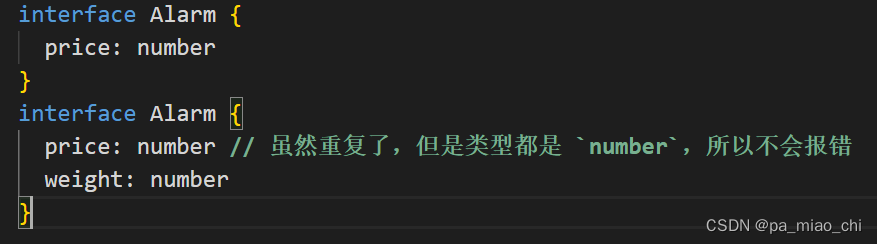
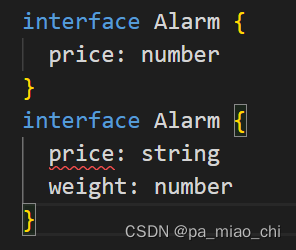
}② 接口的合并
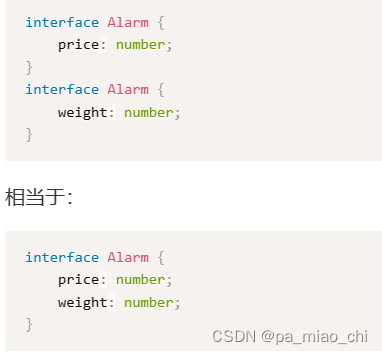
- 合并的属性的类型必须是唯一的
③ 类的合并
类的合并与接口的合并规则一致
十八.编译选项
① allowJs 允许编译js文件
- 一般在项目js, ts混合开发中需要设置
- 设置为true时,js文件会被tsc编译,否则不会
- 设置为true的时候,编译后的文件包含foo.js
- 设置为false的时候,编译后的文件不包含foo.js
② allowSyntheticDefaultImports 允许对不包含默认导出的模块使用默认导入。这个选项不会影响生成的代码,只会影响类型检查
- 在ts中,如果要引入一个export = foo 导出的模块,标准语法是 import foo = require('foo') 或者 import * as foo from 'foo'
- 但是已经习惯使用 import foo from 'foo' ,所以使用了这个设置项
- 如果设置为true, 就允许使用 import foo from 'foo' 来导入一个通过 export = foo 导出的模块,当它设置为false时,则不允许,会报错