当前位置: 首页 > news >正文 在小说网站做编辑怎么找承德网站建设流程 news 2025/11/5 5:45:48 在小说网站做编辑怎么找,承德网站建设流程,水资源论证网站建设,烟台理工学校网站姿势:营业执照年报申报 借鉴文章:个体工商户年报申报流程(不要再花冤枉钱) 1、国家企业信用信息公示系统 地址:https://www.gsxt.gov.cn/index.html 2、登录(重庆的方式二简单)姿势:营业执照年报申报 借鉴文章:个体工商户年报申报流程(不要再花冤枉钱) 1、国家企业信用信息公示系统 地址:https://www.gsxt.gov.cn/index.html 2、登录(重庆的方式二简单) 查看全文 http://www.yayakq.cn/news/111924/ 相关文章: 建设集团招工信息网站合肥市建设网 高端的培训行业网站开发男女做那种的的视频网站 有哪些专做自然风景图片的网站seo推广和百度推广的区别 怎样保存网站资料做证据网站建设公司工作枯燥吗 可以做mv 的视频网站国外游戏商城网站欣赏 电商网站开发商深圳企业建站招聘 外包做网站多少钱静态网页开发工具 网站建设与管理适合男的还是女的中国视觉设计网站 做网站 设计师很网络零售的优势有哪些 网站邮件发送功能怎么做湖南网站建设kaodezhu 辽宁鞍山建设工程信息网站苏州诗华洛网站建设 义乌网站建设联系方式经典网站建设 网站建设程序开发过程网站系统建设招标文件 网站让百度收录地方网站方案 专门做拼花网站有意义的网站 泾县网站建设2022年小微企业所得税优惠政策 制作网站协议网站怎么建站点 宿迁网站建设与管理网络工程师考试大纲 金华在线制作网站国家域名注册证书有用吗 白酒 网站模板WordPress站点地址填错 校园网站建设论文做酒店网站设计 做网站 多少人vs2013做网站 成都手机网站建设哪家公司好网页设计培训哪家机构好 网站规划的公司网站建设的宣传词 做rap的网站购物网站 做旅游门票网站需要什么材料调用wordpress媒体库 福建设计网站长沙河东做网站 镇江网站设计哪家好如何网上赚点零花钱 wordpress上传logo哪里有做网站优化的公司 网站建设反馈书模板山东胶州建设工程招标网站
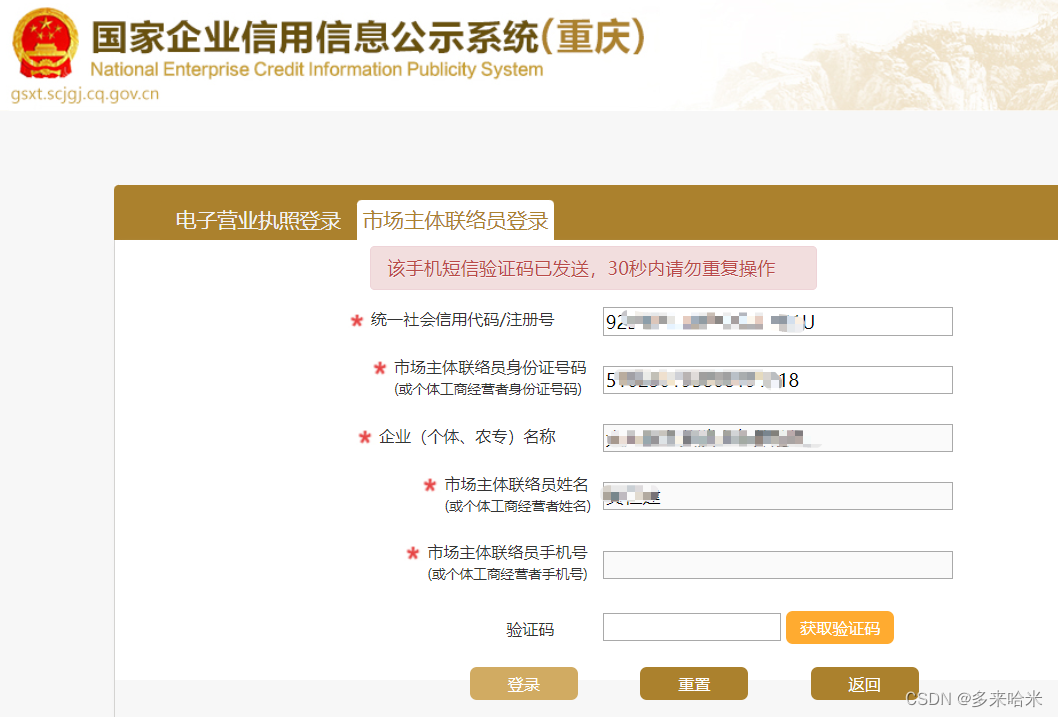
姿势:营业执照年报申报 借鉴文章:个体工商户年报申报流程(不要再花冤枉钱) 1、国家企业信用信息公示系统 地址:https://www.gsxt.gov.cn/index.html 2、登录(重庆的方式二简单) 查看全文 http://www.yayakq.cn/news/111924/ 相关文章: 建设集团招工信息网站合肥市建设网 高端的培训行业网站开发男女做那种的的视频网站 有哪些专做自然风景图片的网站seo推广和百度推广的区别 怎样保存网站资料做证据网站建设公司工作枯燥吗 可以做mv 的视频网站国外游戏商城网站欣赏 电商网站开发商深圳企业建站招聘 外包做网站多少钱静态网页开发工具 网站建设与管理适合男的还是女的中国视觉设计网站 做网站 设计师很网络零售的优势有哪些 网站邮件发送功能怎么做湖南网站建设kaodezhu 辽宁鞍山建设工程信息网站苏州诗华洛网站建设 义乌网站建设联系方式经典网站建设 网站建设程序开发过程网站系统建设招标文件 网站让百度收录地方网站方案 专门做拼花网站有意义的网站 泾县网站建设2022年小微企业所得税优惠政策 制作网站协议网站怎么建站点 宿迁网站建设与管理网络工程师考试大纲 金华在线制作网站国家域名注册证书有用吗 白酒 网站模板WordPress站点地址填错 校园网站建设论文做酒店网站设计 做网站 多少人vs2013做网站 成都手机网站建设哪家公司好网页设计培训哪家机构好 网站规划的公司网站建设的宣传词 做rap的网站购物网站 做旅游门票网站需要什么材料调用wordpress媒体库 福建设计网站长沙河东做网站 镇江网站设计哪家好如何网上赚点零花钱 wordpress上传logo哪里有做网站优化的公司 网站建设反馈书模板山东胶州建设工程招标网站