wordpress pc站m站做网站公司 深圳信科
Stable Diffusion

Stable Diffusion 是由 Stability AI 推出的开源 AI 文本到图像生成模型,以其开放性和灵活性在 AI 视觉工具领域广受欢迎。与 DALL-E 或 Midjourney 等只能依赖云计算的工具不同,Stable Diffusion 支持本地运行,也广泛兼容多个云平台,如DreamStudio、Onethingai、Stable Artisan等,为用户提供了更多选择。不论是个人用户还是专业创意团队,都可以根据需求在不同环境中使用它,享受高效的生成体验。
stable diffusion整合包可以扫描下方,免费获取

主要功能
0****1
多平台兼容
Stable Diffusion 支持本地和云端运行,用户可以根据硬件条件选择最合适的运行方式。在云平台上运行,能够节省硬件资源;而本地运行则保证了数据隐私,为对信息安全有较高要求的用户提供了更可靠的选择。
0****2
场景和元素细节调整
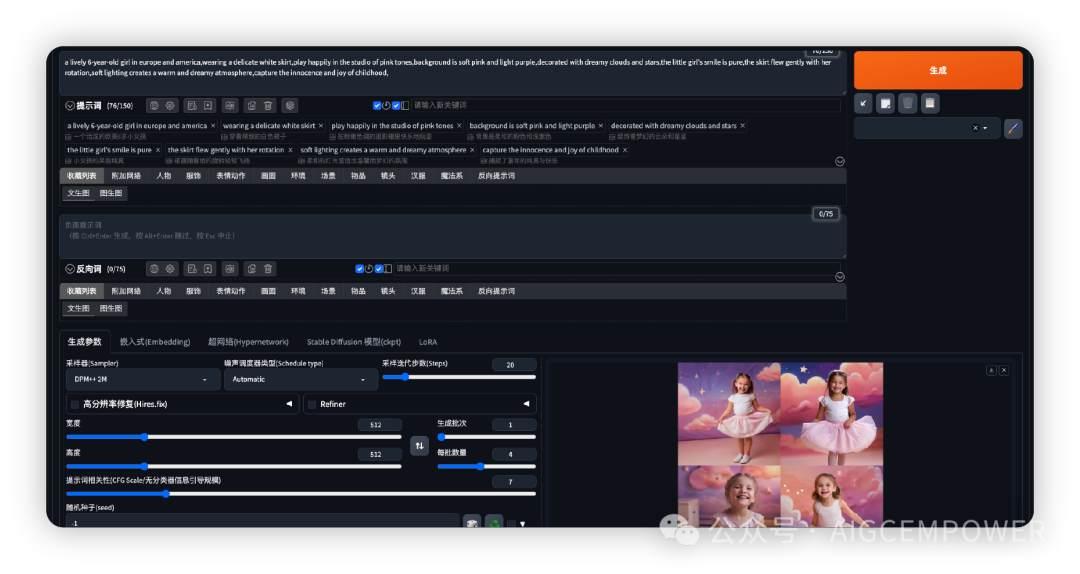
Stable Diffusion 提供了对生成内容的高可控性,用户可以在创建过程中细化对场景、产品、模特等各元素的描述,使图像更加精准。例如,通过控制姿势、角度、光影等细节,用户可以更真实地还原设计需求,这在广告、产品展示等领域尤其实用。
0****3
强大的自定义扩展性
Stable Diffusion 的代码和模型权重是完全开源的,用户可以自由地对模型进行定制和调整。这一特点让开发者和研究人员可以探索更具创意的生成方式,甚至能够开发专属模型以满足特定业务需求。
stable diffusion生成示例
实际应用场景
0****1
个性化内容创作
对于需要保密或有独特创意需求的创作者而言,Stable Diffusion 是一个理想的选择。它不仅支持离线运行,还允许用户通过代码调整生成效果,为艺术家和设计师提供了更多发挥空间。
02
产品原型与设计
设计师可以使用 Stable Diffusion 生成原型图片,并根据不同产品特性进行二次优化。例如,在设计一款新产品外观时,Stable Diffusion 可以快速生成多个概念图供参考,大幅提升设计效率。
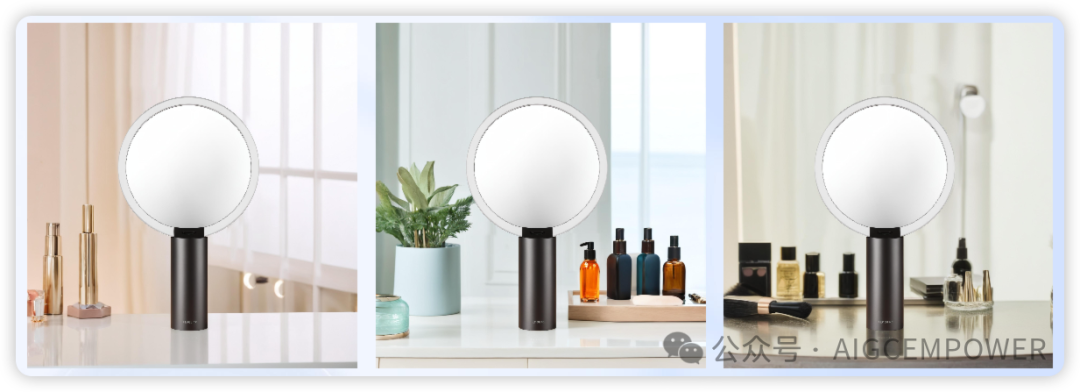
产品在不同环境的场景展示
开放的未来潜力
Stable Diffusion 不仅仅是一个生成图像的工具,更是一个赋予用户完全控制权的平台。无论是小型团队、个人开发者,还是专业机构,都可以利用它进行更具个性化的创意探索。如果你希望拥有更多的创作自由和私密性,Stable Diffusion 无疑是你值得尝试的 AI 图像生成助手。
关于AI绘画技术储备
学好 AI绘画 不论是就业还是做副业赚钱都不错,但要学会 AI绘画 还是要有一个学习规划。最后大家分享一份全套的 AI绘画 学习资料,给那些想学习 AI绘画 的小伙伴们一点帮助!
对于0基础小白入门:
如果你是零基础小白,想快速入门AI绘画是可以考虑的。
一方面是学习时间相对较短,学习内容更全面更集中。
二方面是可以找到适合自己的学习方案
包括:stable diffusion安装包、stable diffusion0基础入门全套PDF,视频学习教程。带你从零基础系统性的学好AI绘画!
零基础AI绘画学习资源介绍
👉stable diffusion新手0基础入门PDF👈
(全套教程文末领取哈)

👉AI绘画必备工具👈

温馨提示:篇幅有限,已打包文件夹,获取方式在:文末
👉AI绘画基础+速成+进阶使用教程👈
观看零基础学习视频,看视频学习是最快捷也是最有效果的方式,跟着视频中老师的思路,从基础到深入,还是很容易入门的。

温馨提示:篇幅有限,已打包文件夹,获取方式在:文末
👉12000+AI关键词大合集👈

这份完整版的AI绘画全套学习资料已经上传CSDN,朋友们如果需要可以微信扫描下方CSDN官方认证二维码免费领取【保证100%免费】
