公司网站建设推荐q479185700顶上外贸进口流程
简介
上一篇说了关于json数据处理,是为了断言方便,这篇就带各位小伙伴实战一下。首先捋一下思路,然后根据思路一步一步的去实现和实战,不要一开始就盲目的动手和无头苍蝇一样到处乱撞,撞得头破血流后而放弃了。不仅什么没学习
到,自己的自信心都受到打击了,自己都怀疑自己。其实你是最棒的,天生我材必有用,好了废话不说,进入实战——以查看快递物流接口为例。
大致流程步骤:web页面操作—>抓包看参数和url—>代码模拟接口请求—>取到接口返回结果—>断言
web页面操作
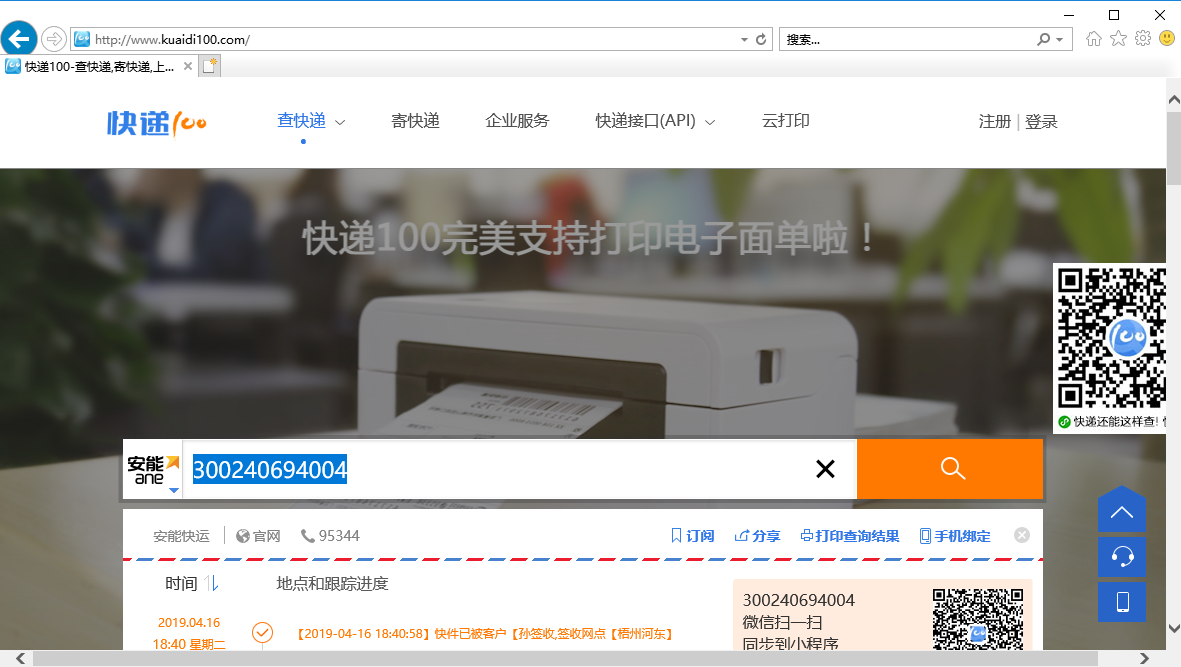
1、浏览器输入快递物流查询url,输入快递单号,点击“查询”
抓包看参数和url
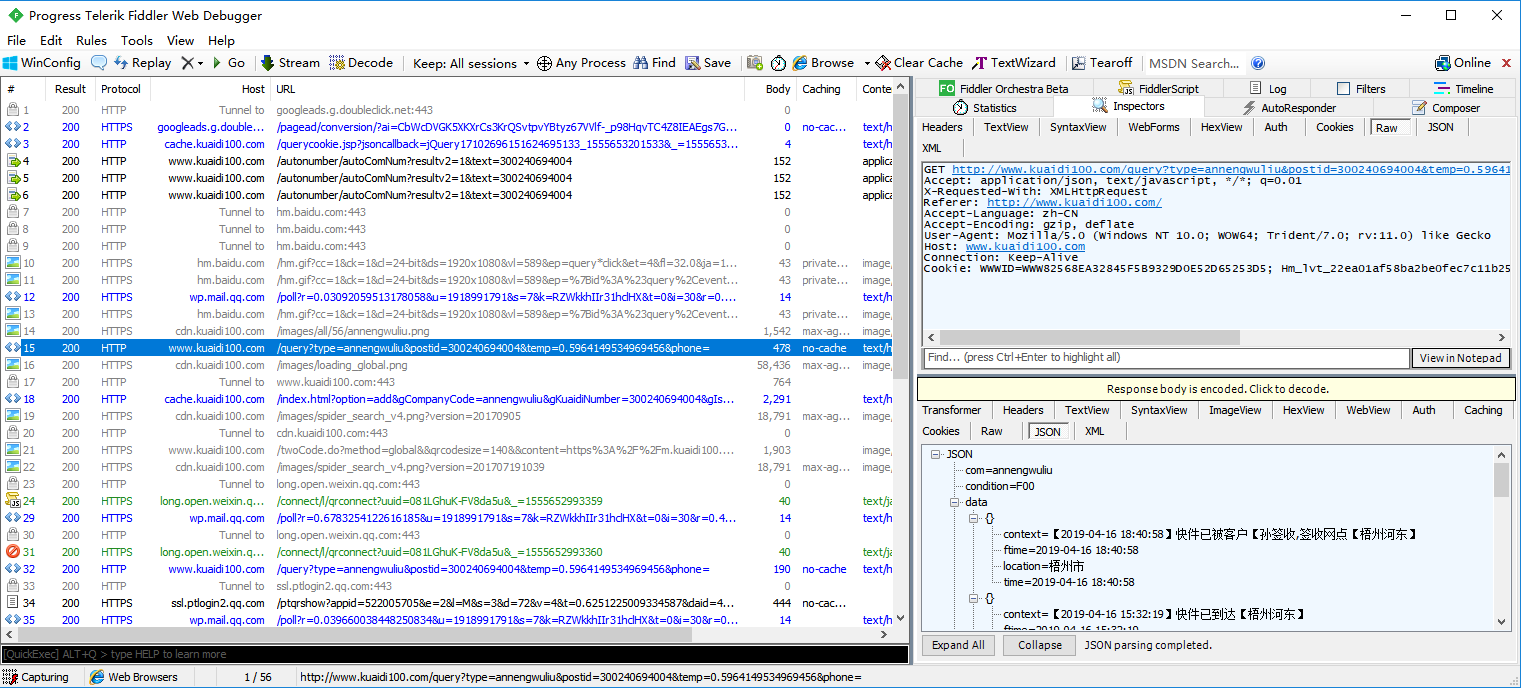
1、点击“查询”,fiddler抓包,查看url和参数
代码模拟接口请求
取到接口返回结果

断言

代码及运行结果
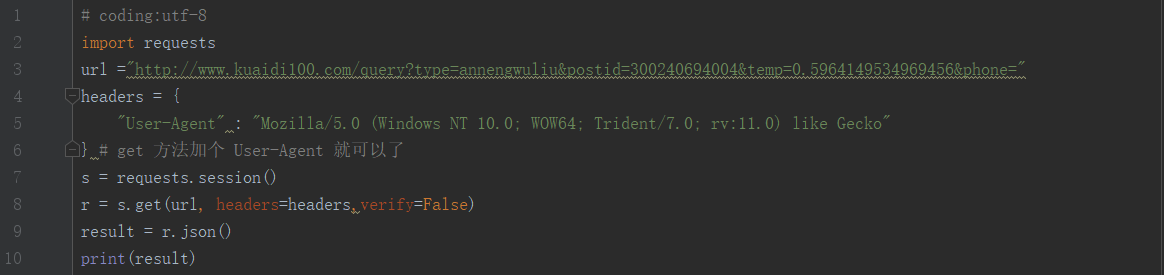
参考代码
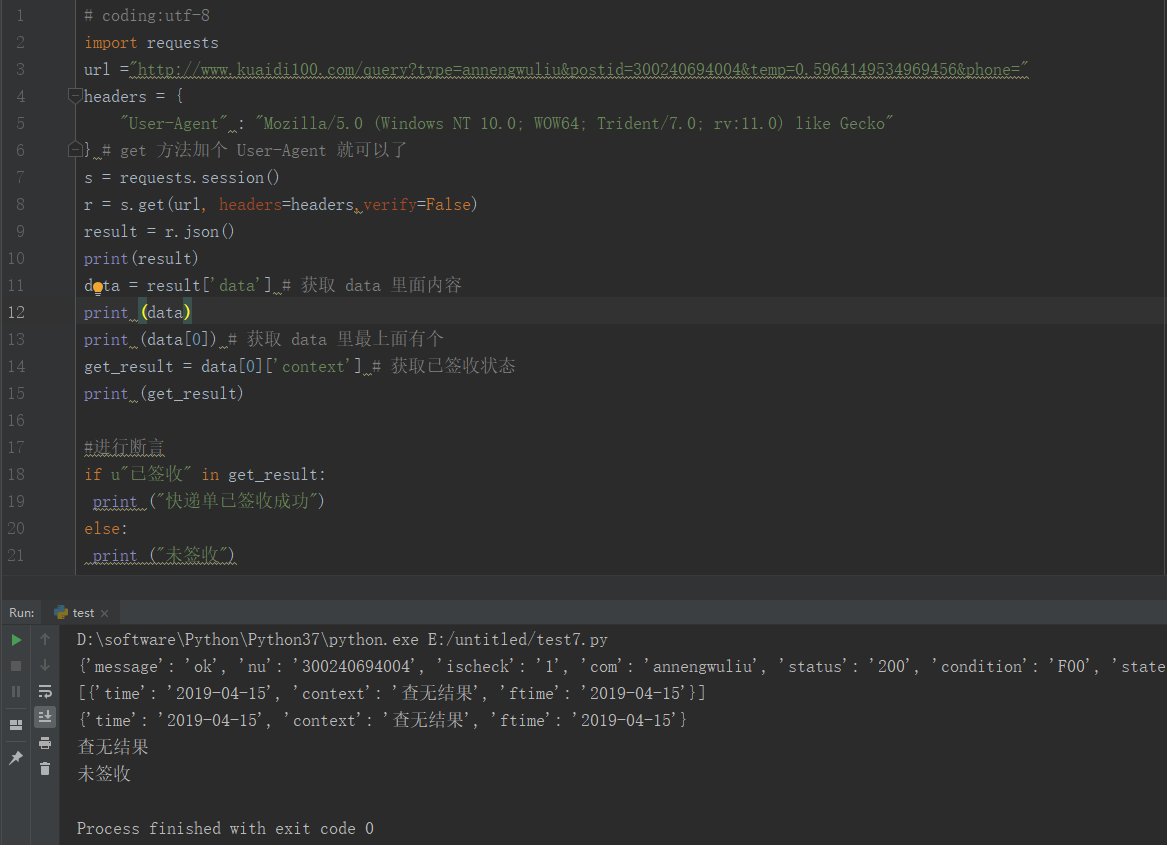
 1 # coding:utf-82 import requests3 url ="http://www.kuaidi100.com/query?type=annengwuliu&postid=300240694004&temp=0.5964149534969456&phone="4 headers = {5     "User-Agent" : "Mozilla/5.0 (Windows NT 10.0; WOW64; Trident/7.0; rv:11.0) like Gecko"6 } # get 方法加个 User-Agent 就可以了7 s = requests.session()8 r = s.get(url, headers=headers,verify=False)9 result = r.json()
10 print(result)
11 data = result['data'] # 获取 data 里面内容
12 print (data)
13 print (data[0]) # 获取 data 里最上面有个
14 get_result = data[0]['context'] # 获取已签收状态
15 print (get_result)
16
17 #进行断言
18 if u"已签收" in get_result:
19  print ("快递单已签收成功")
20 else:
21  print ("未签收")
小结
各位小伙伴,看到了,断言就是这么简单,其实和你写的测试用例差不多,将预期与实际结果进行对比,只不过是用代码体现出来。
最后感谢每一个认真阅读我文章的人,看着粉丝一路的上涨和关注,礼尚往来总是要有的,虽然不是什么很值钱的东西,如果你用得到的话可以直接拿走!

软件测试面试文档
我们学习必然是为了找到高薪的工作,下面这些面试题是来自阿里、腾讯、字节等一线互联网大厂最新的面试资料,并且有字节大佬给出了权威的解答,刷完这一套面试资料相信大家都能找到满意的工作。