南宁网站设计方法网站备案人有什么责任
智慧城市数字孪生系统
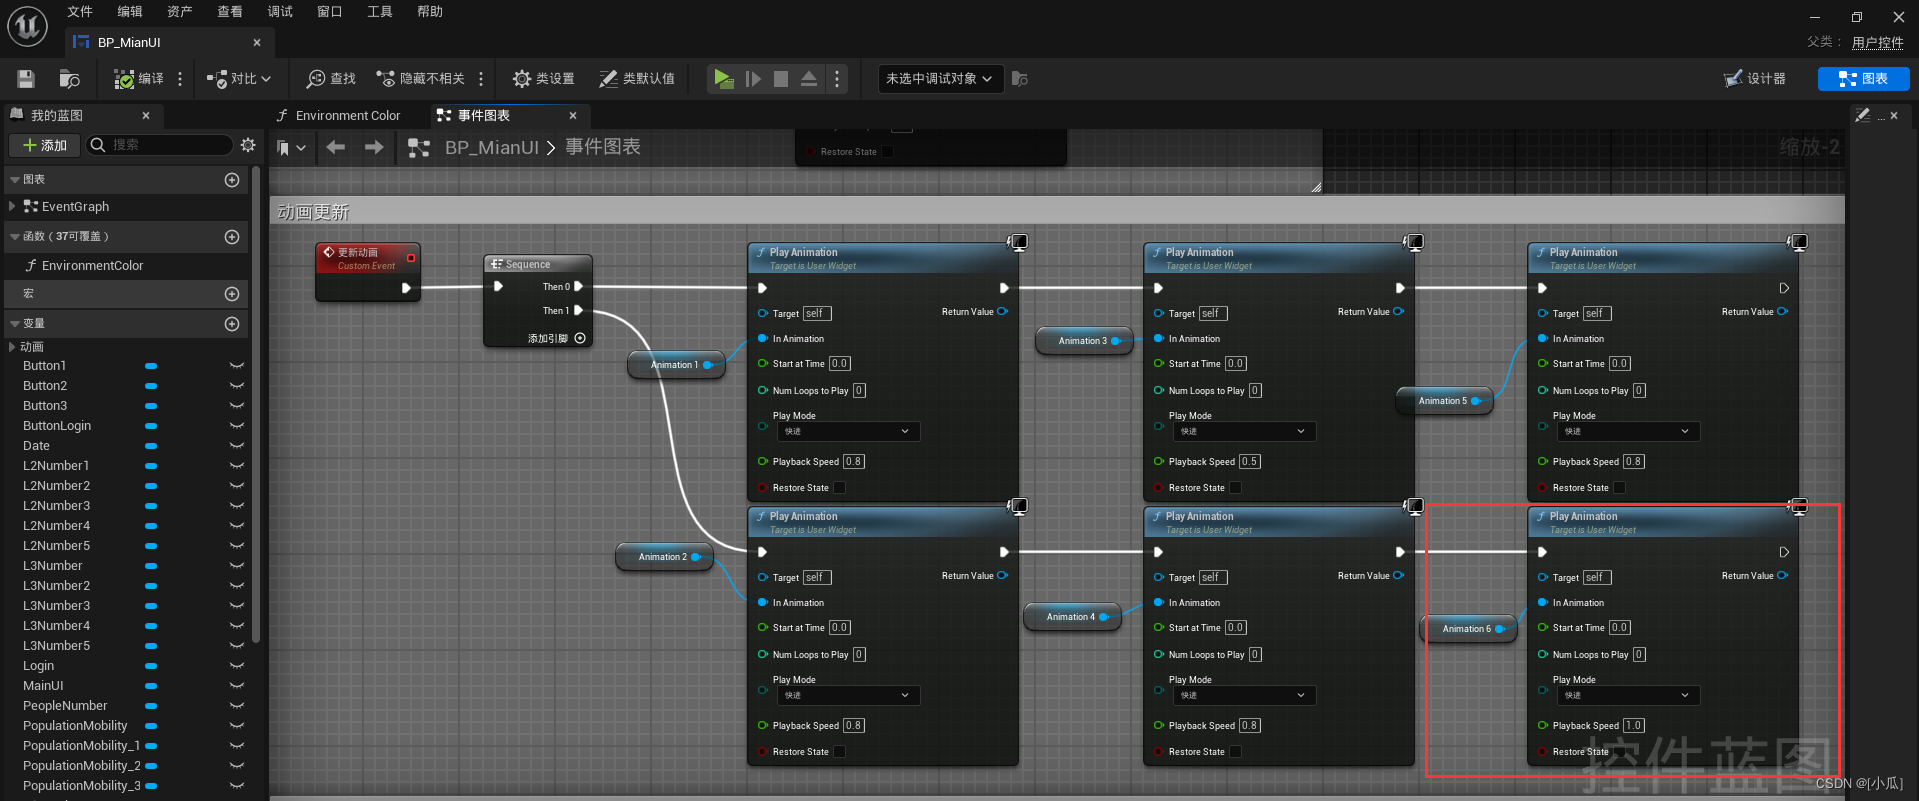
制作流云动画效果
- 首先添加一个图像在需要添加流云效果的位置

- 添加动画效果让其旋转
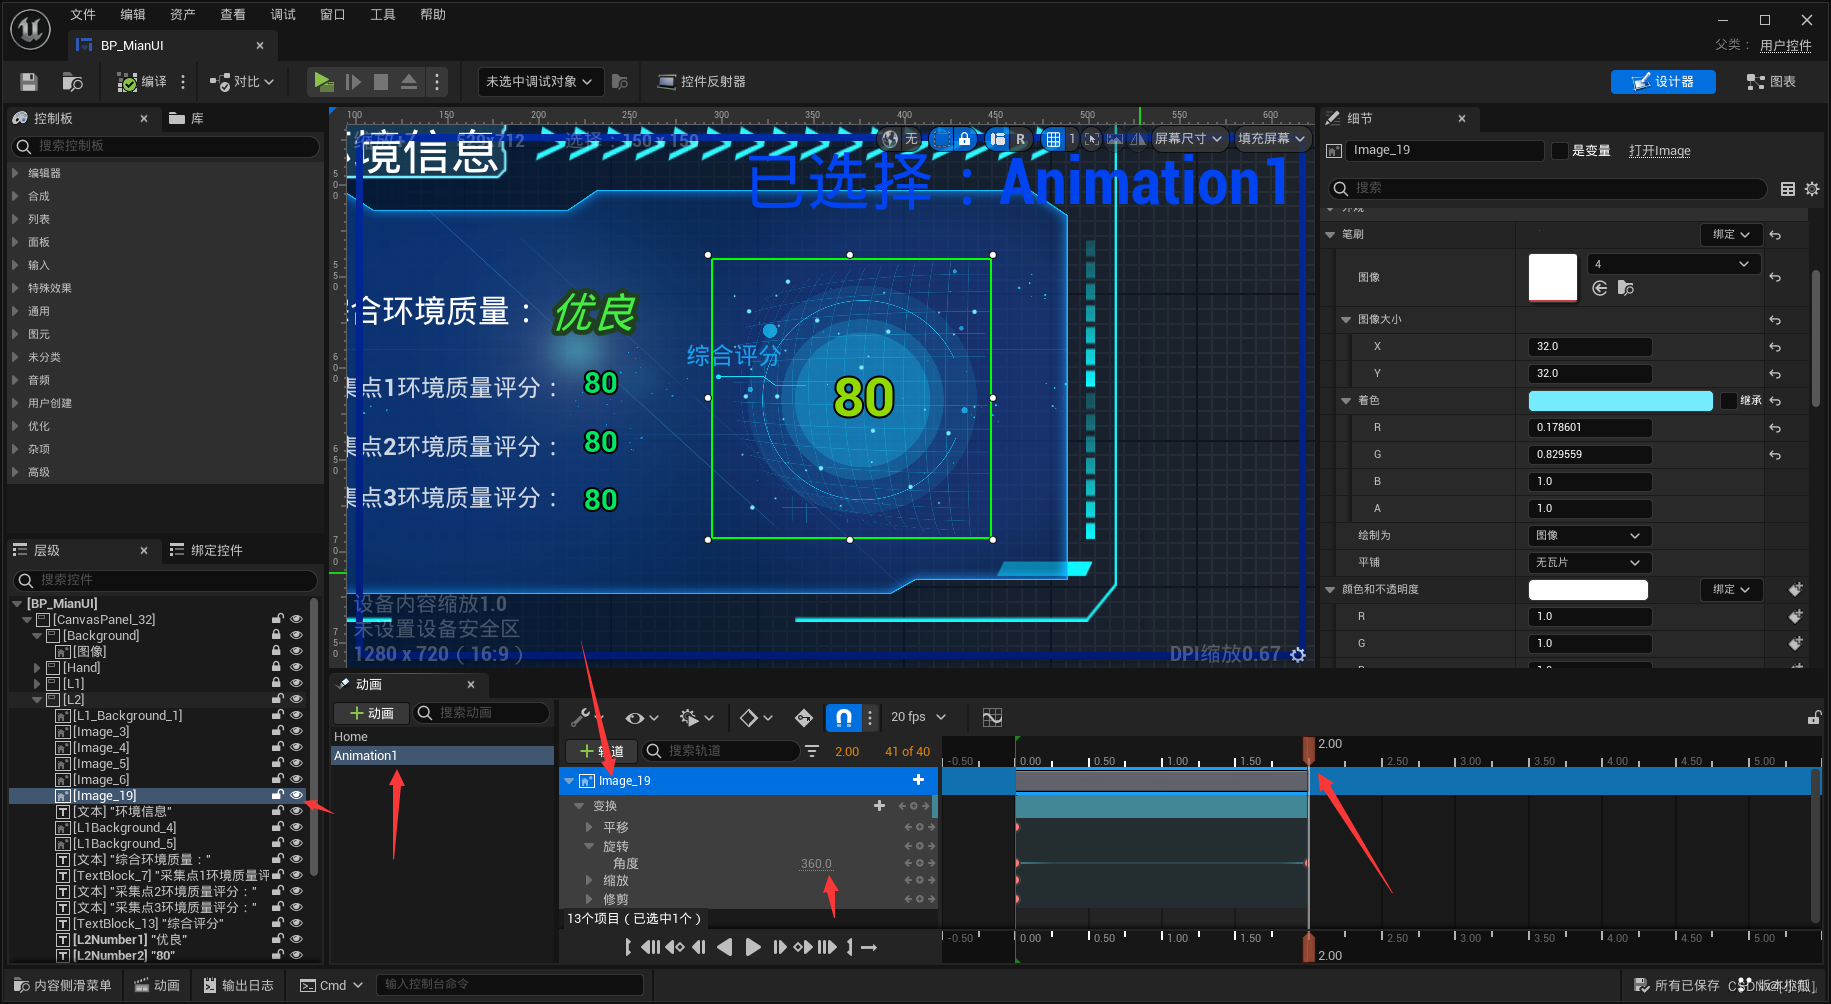
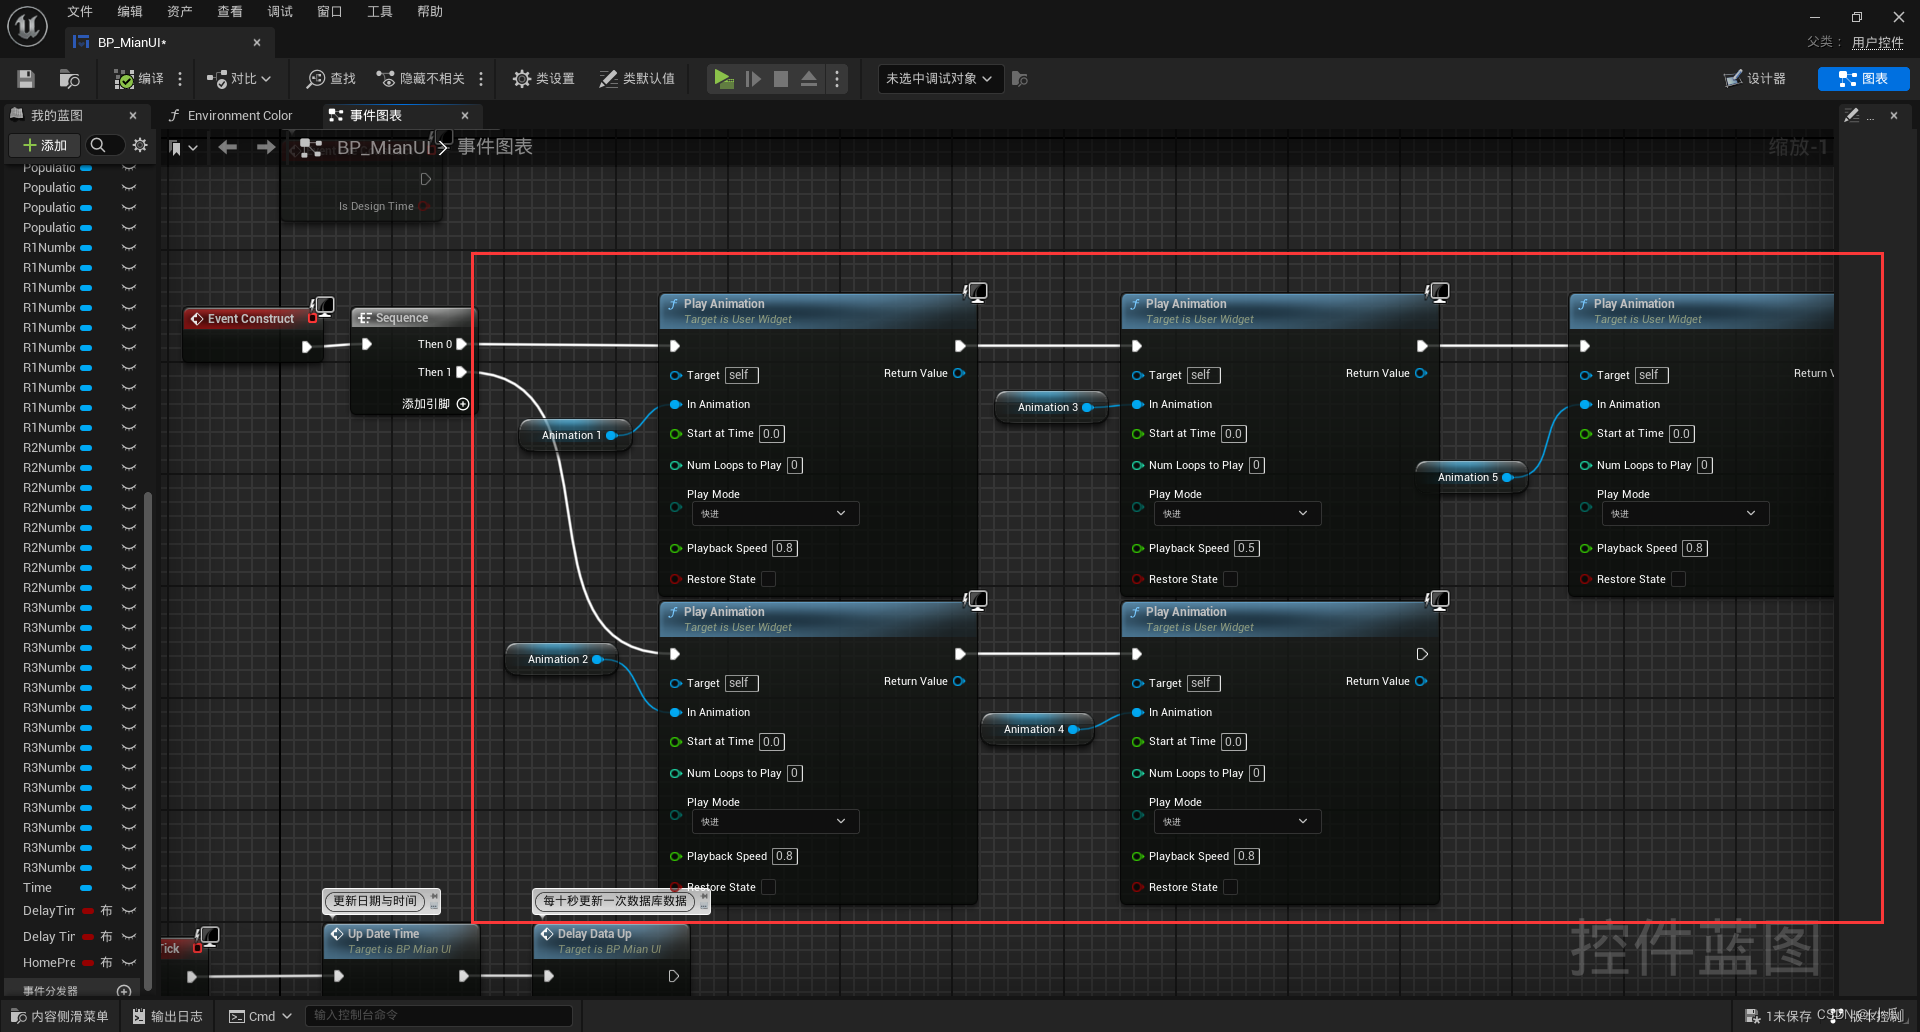
- 这个动画效果是程序开始就要进行的,所以要在
EventConstruct中就可以启动这个动画效果
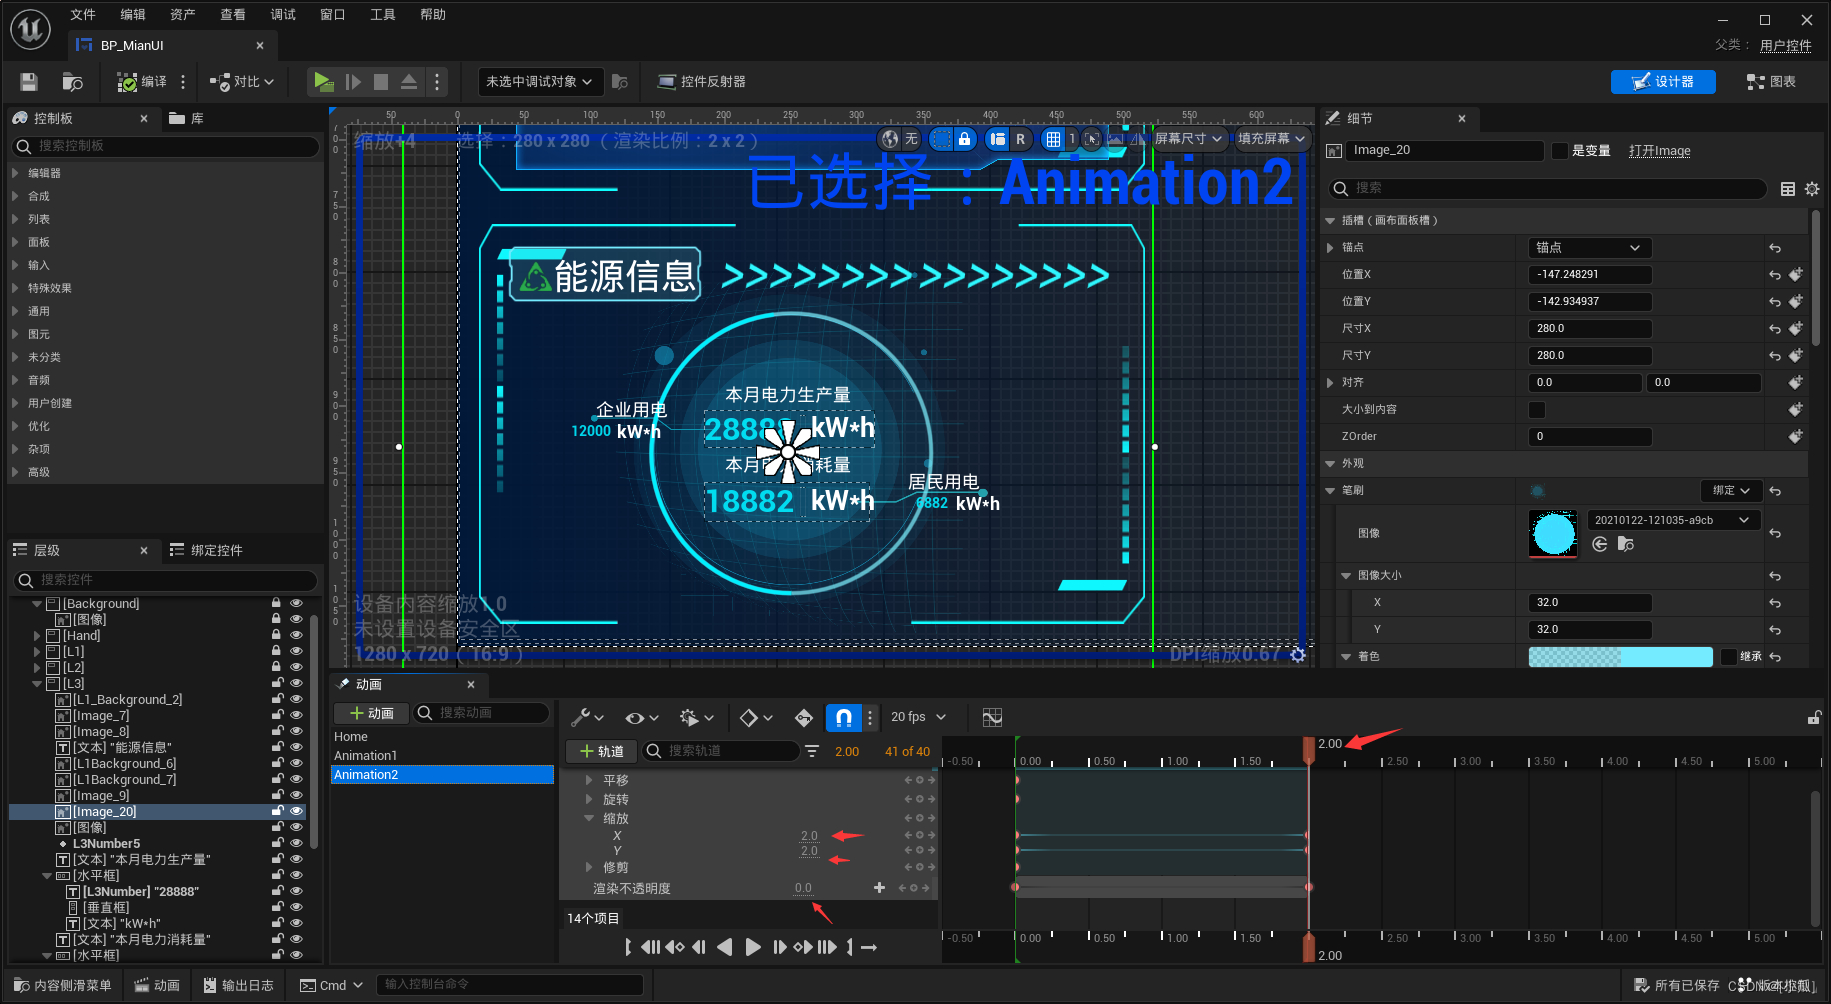
- 添加一个一样的图像在这里,效果是从此处进行放大消散
- 添加动画进行放大消散
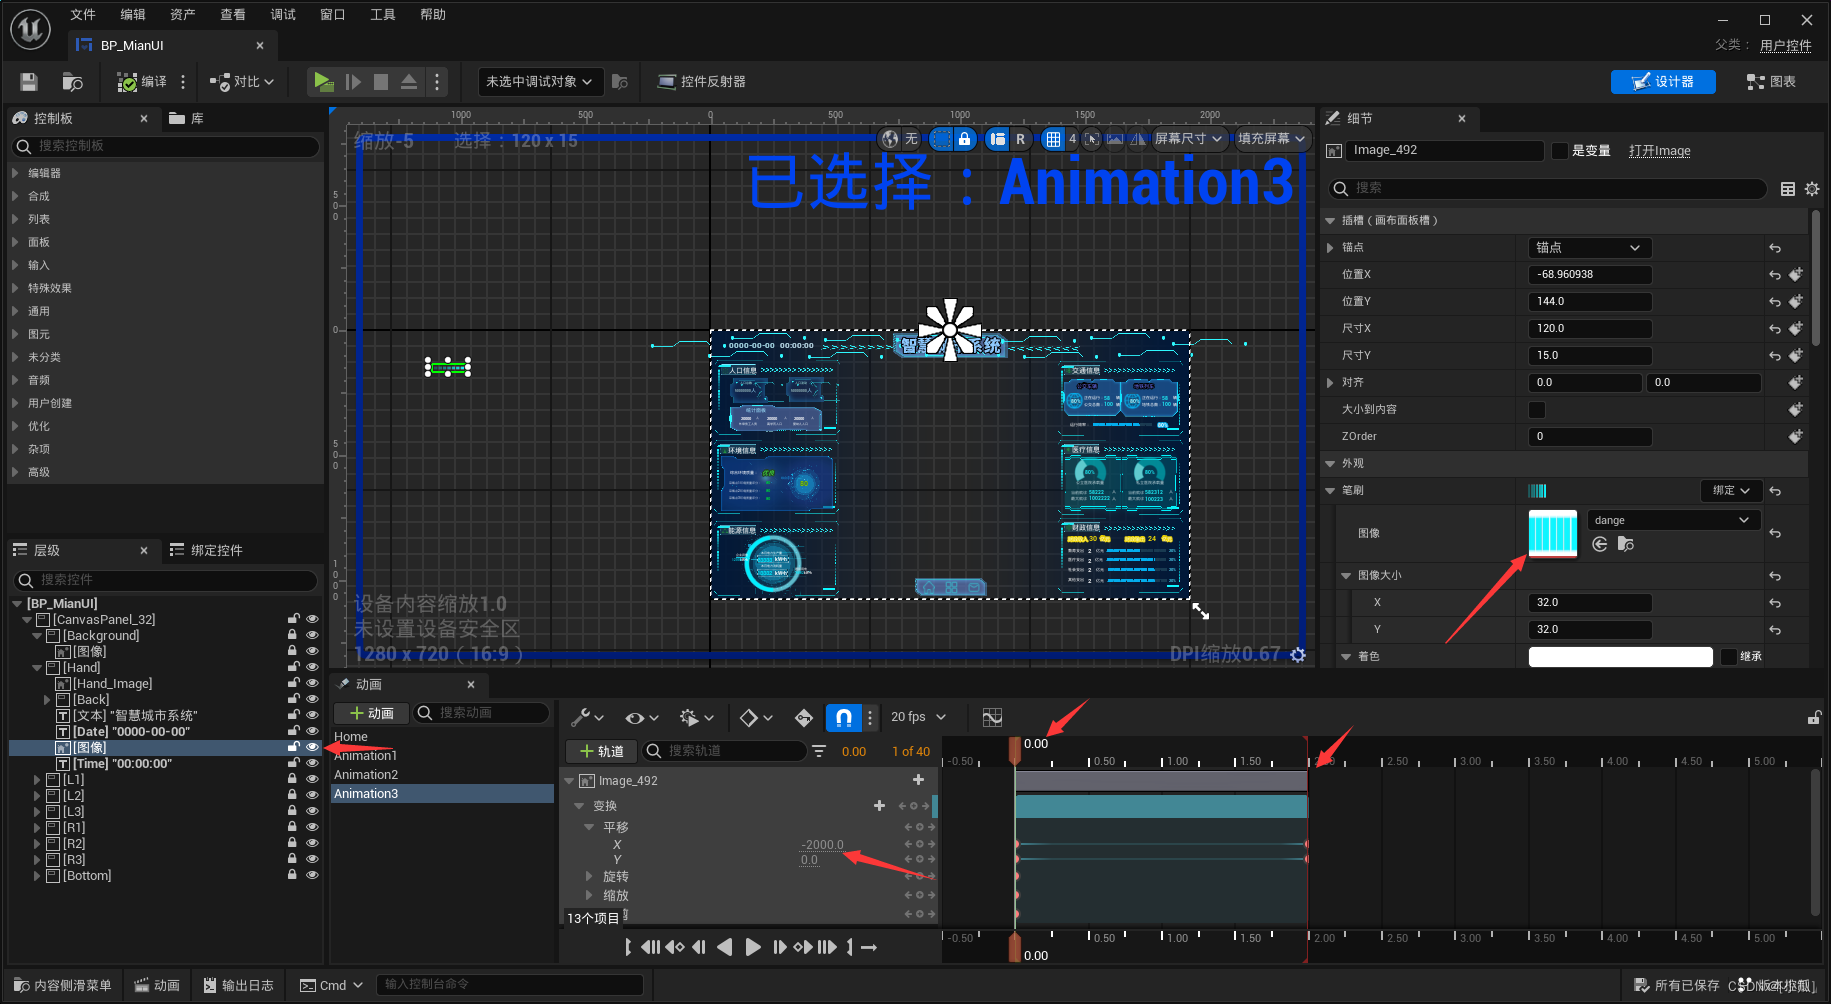
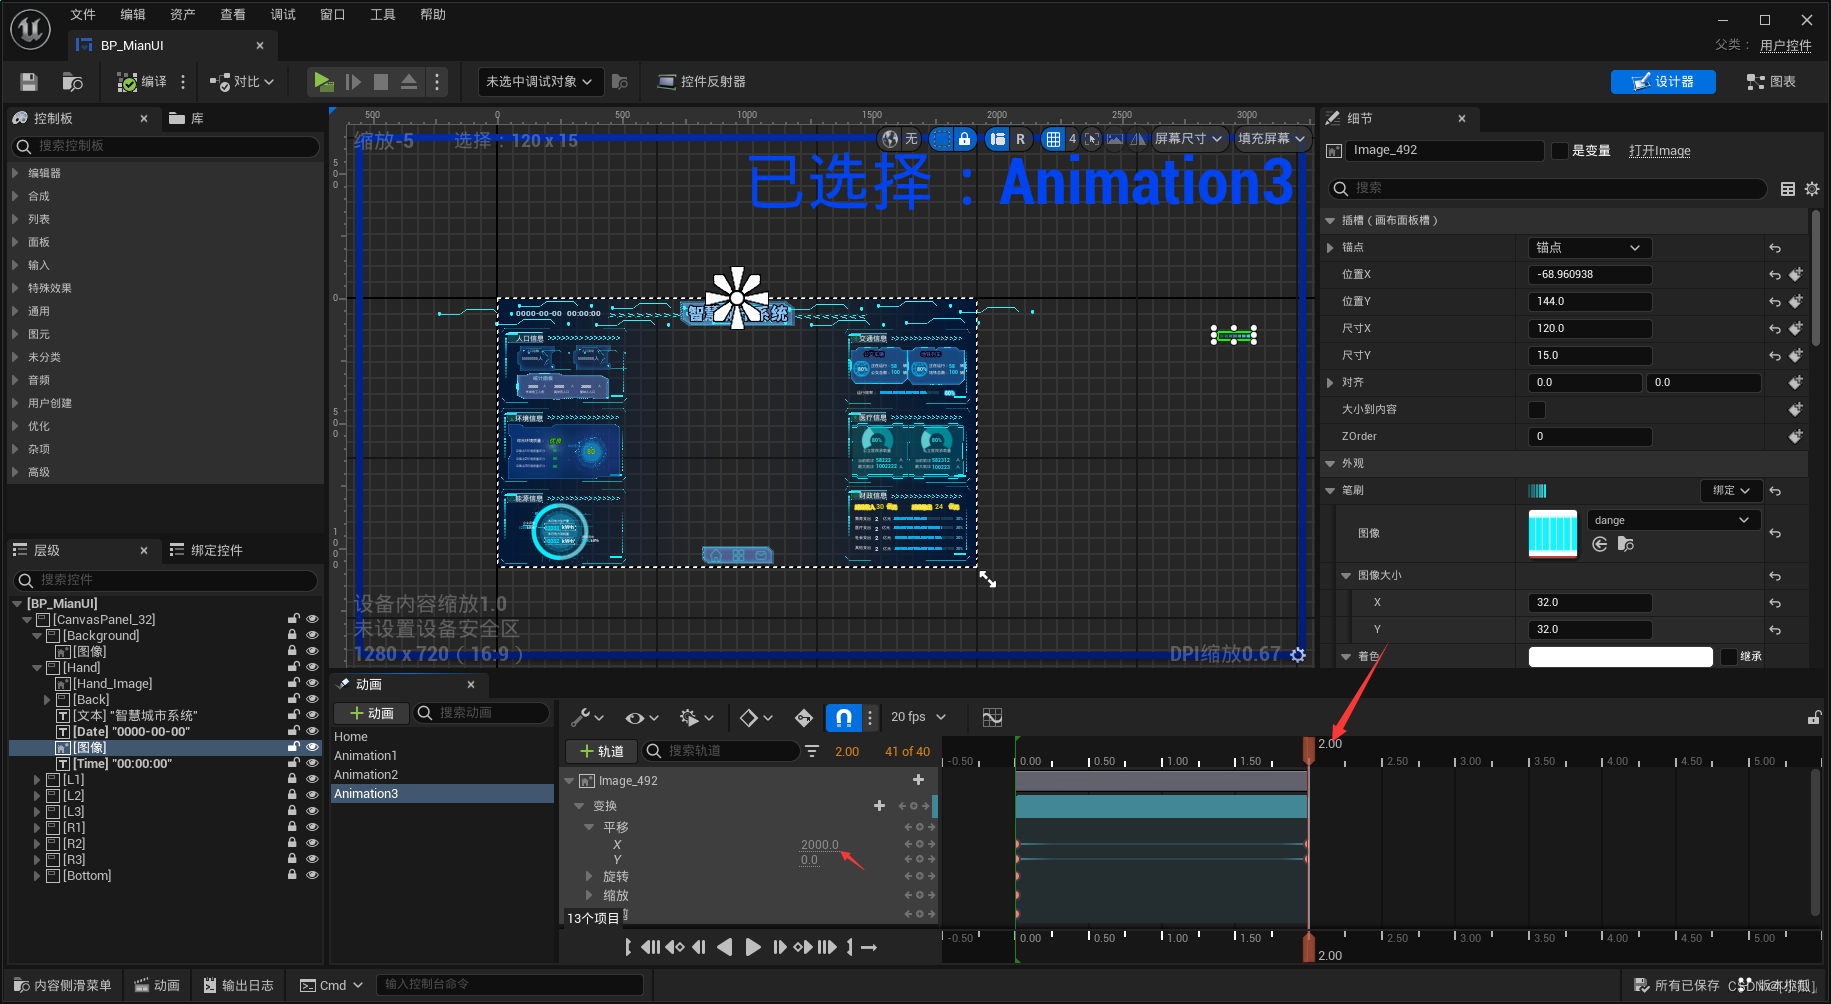
- 添加动画进行流光动画效果
- 小球旋转动画


- 开始就开启这些动画效果
天气UI制作
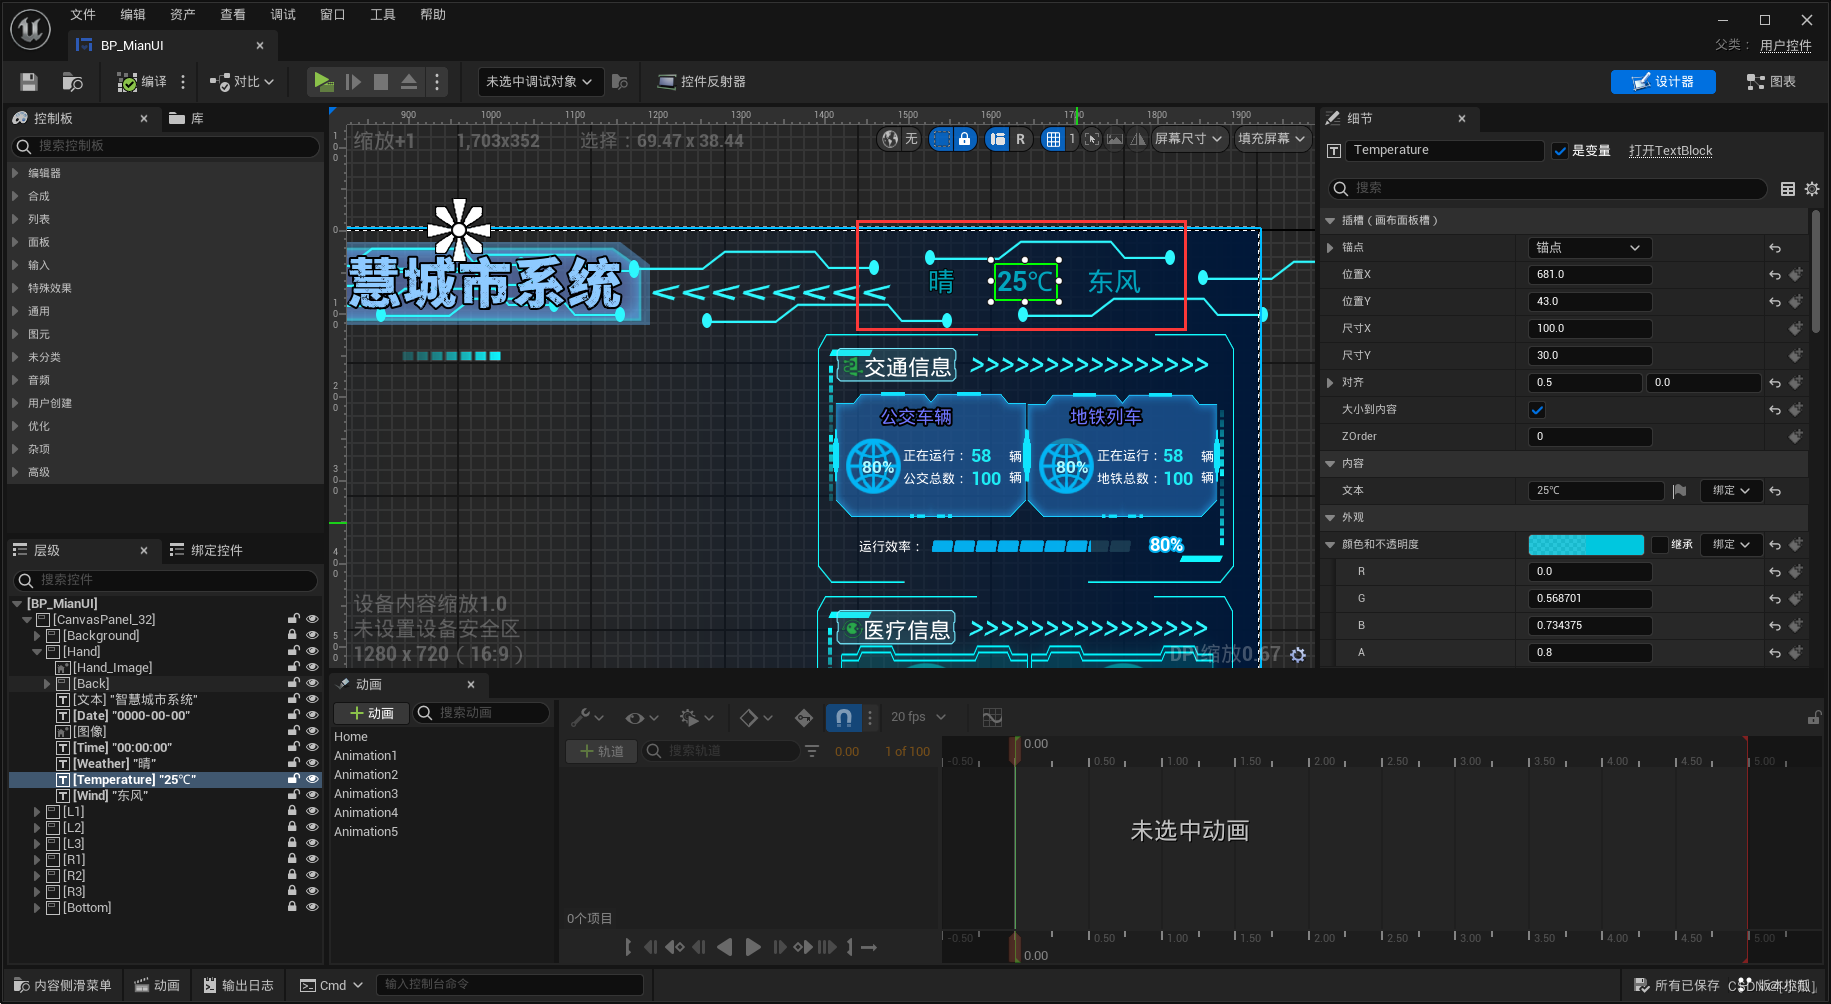
高德地图api获取
-
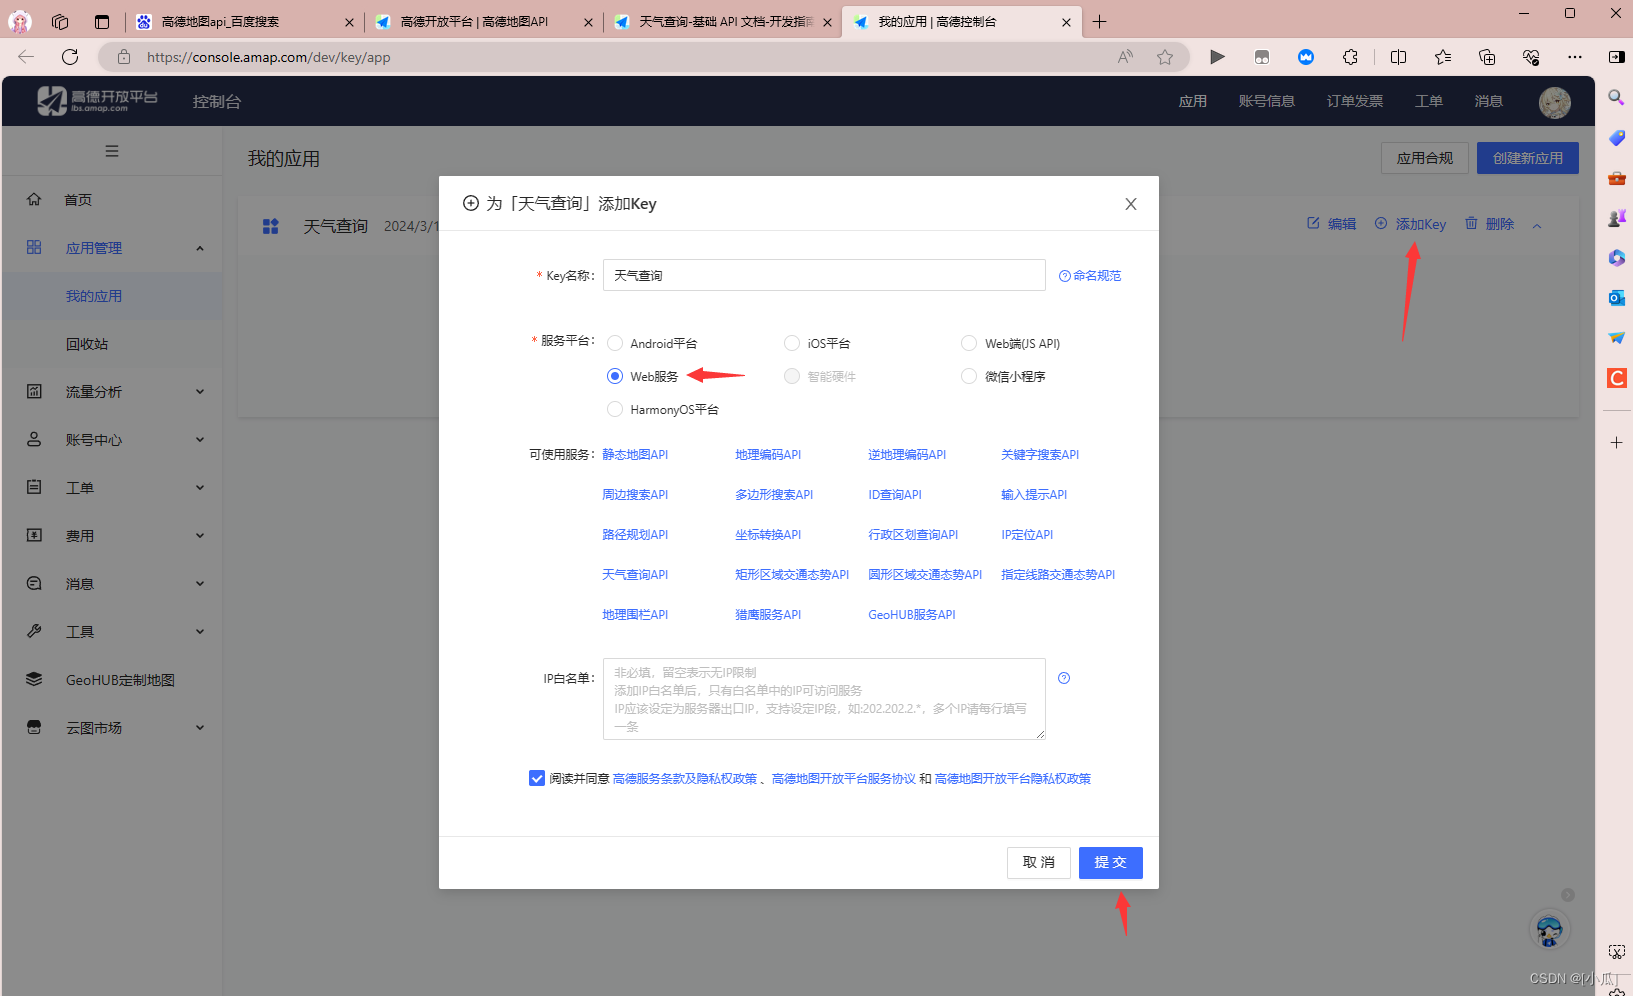
申请一个天气查询的key

-
创建新应用

-
添加key
-
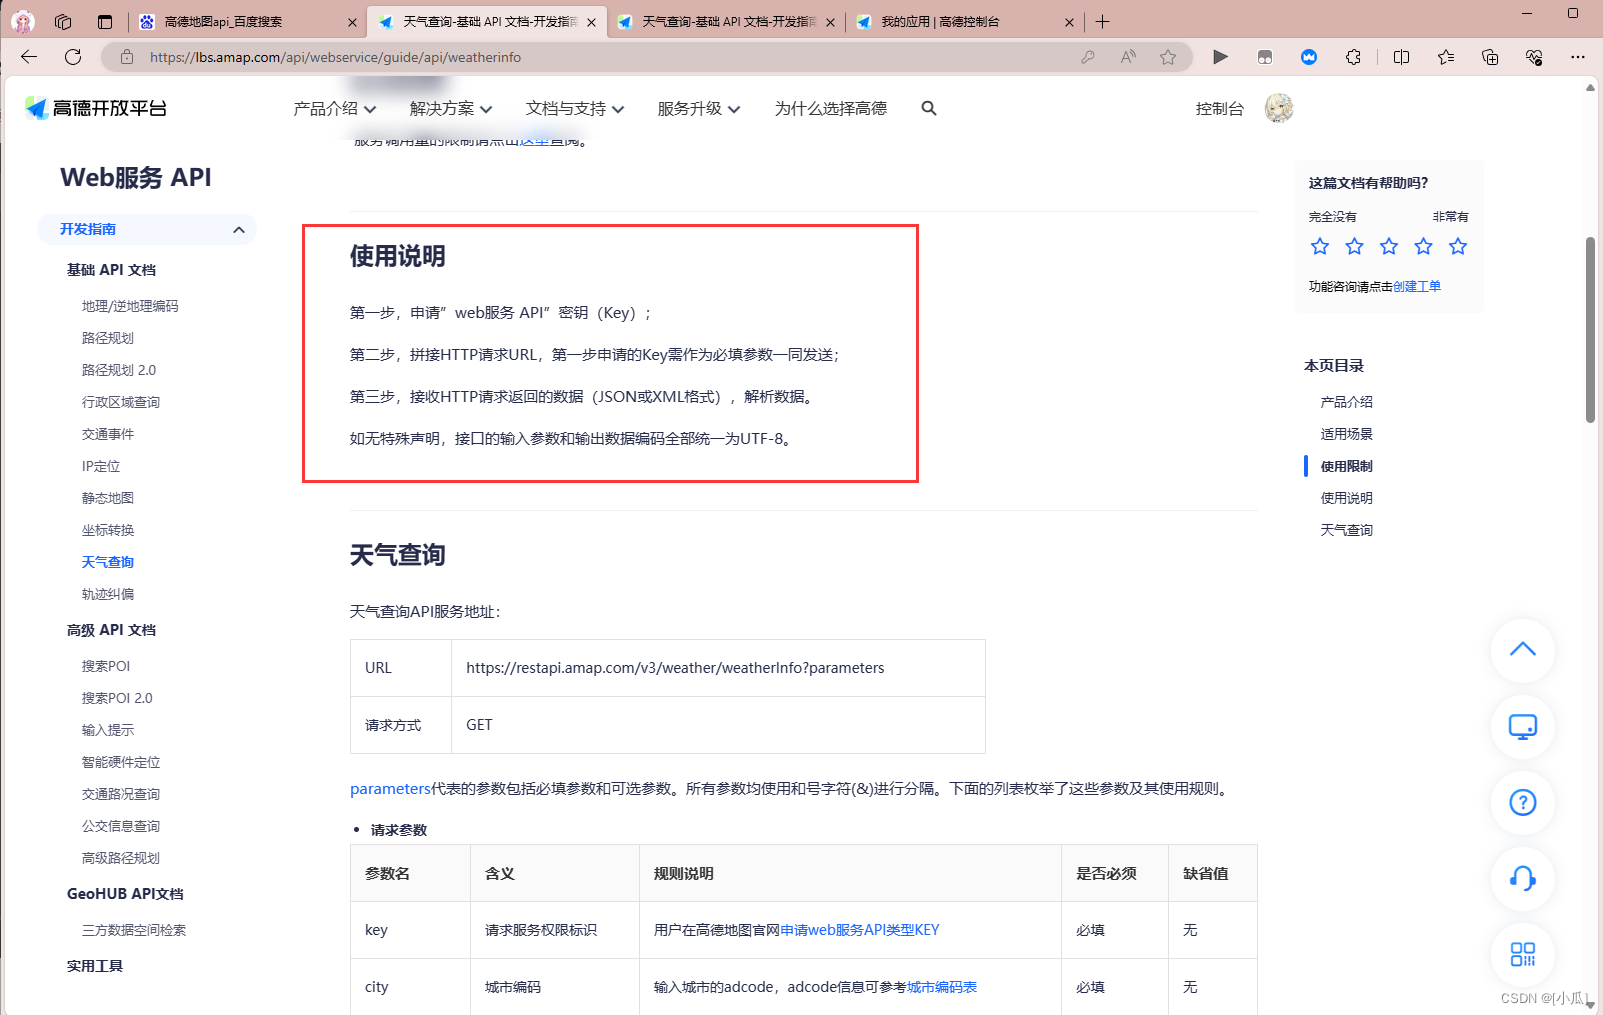
根据帮助文档使用即可
-
城市编码表下载
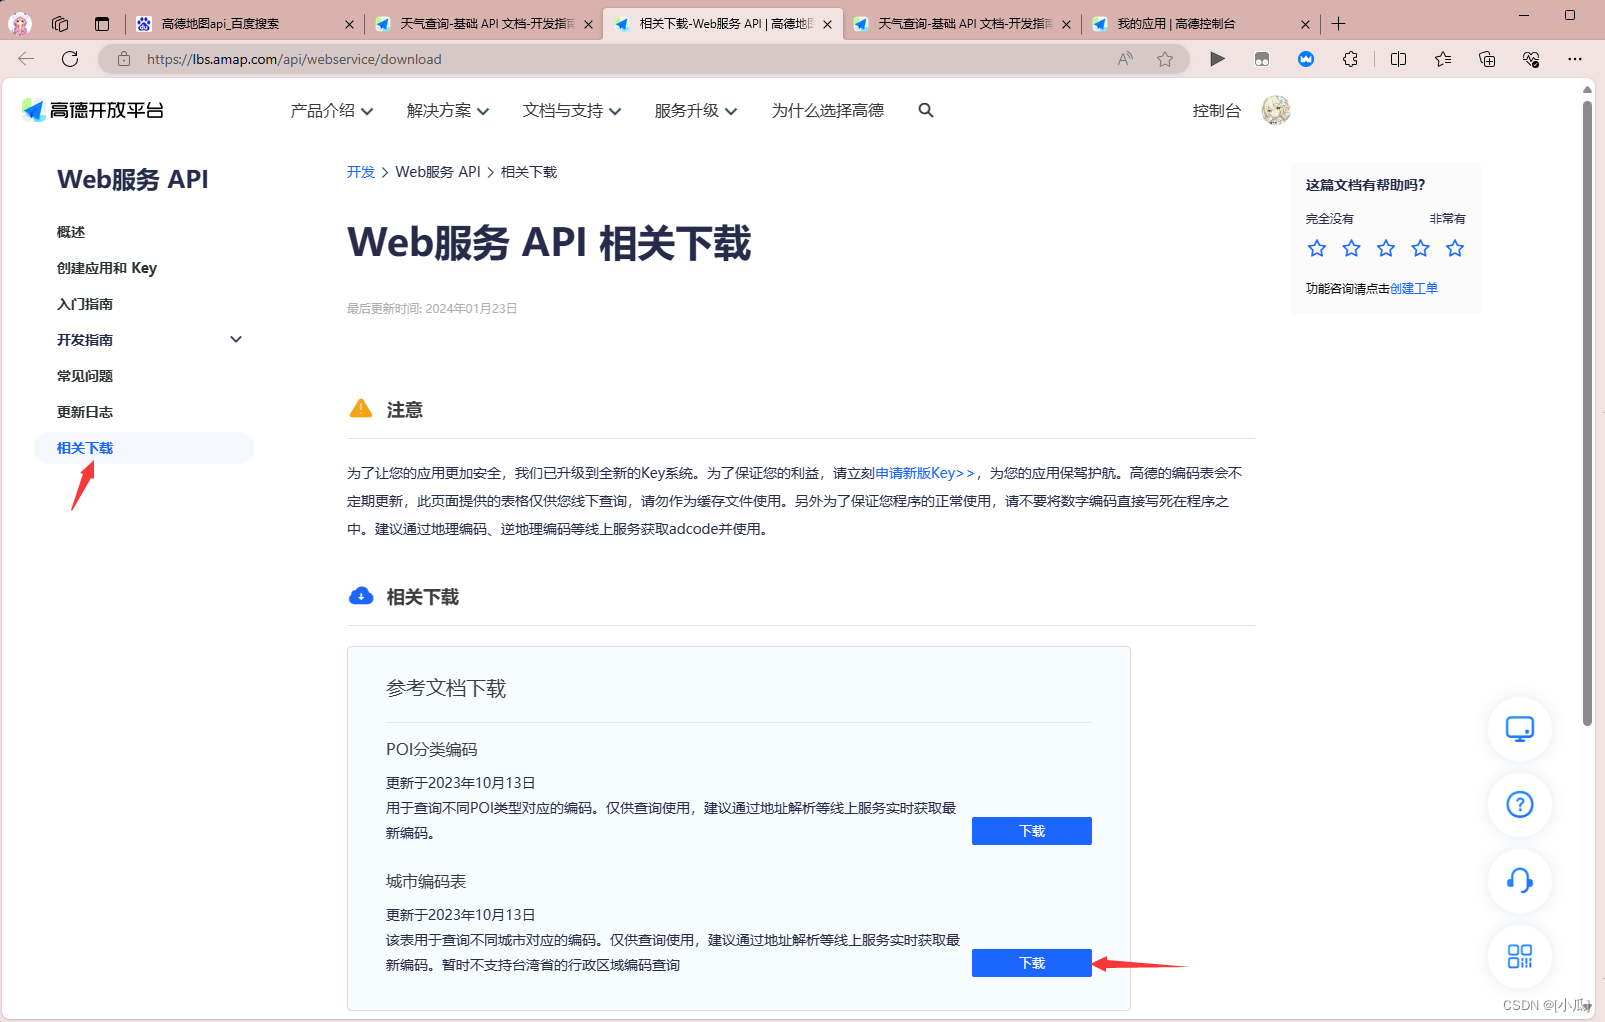
-
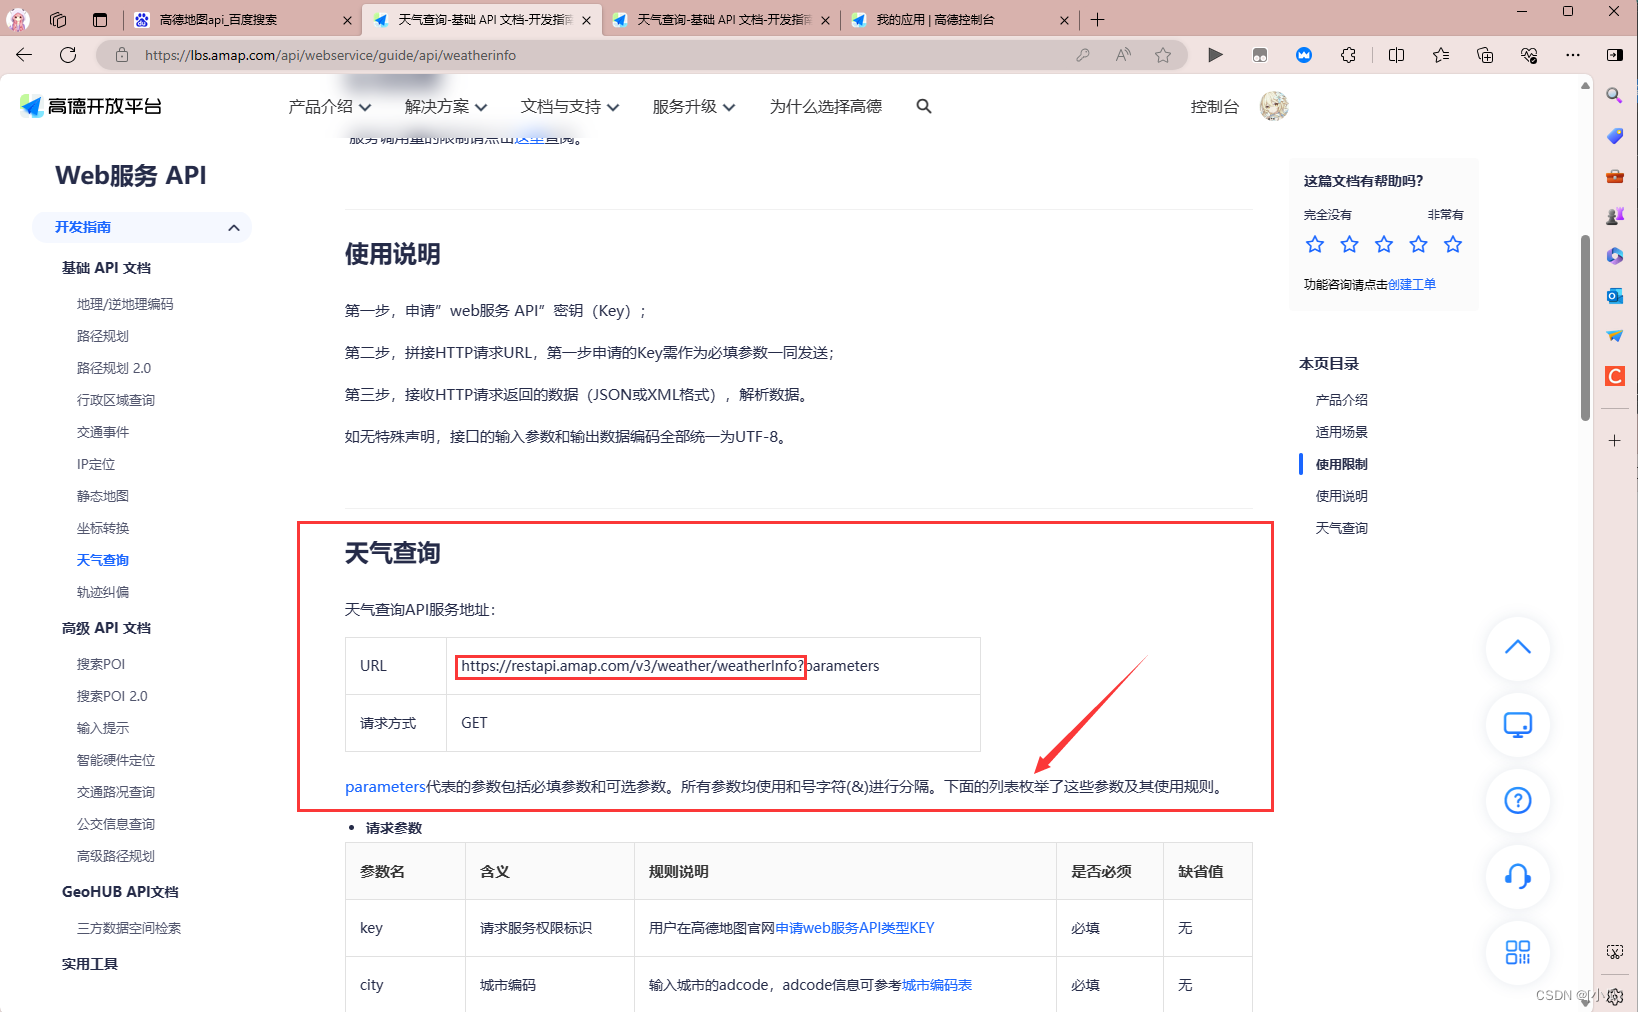
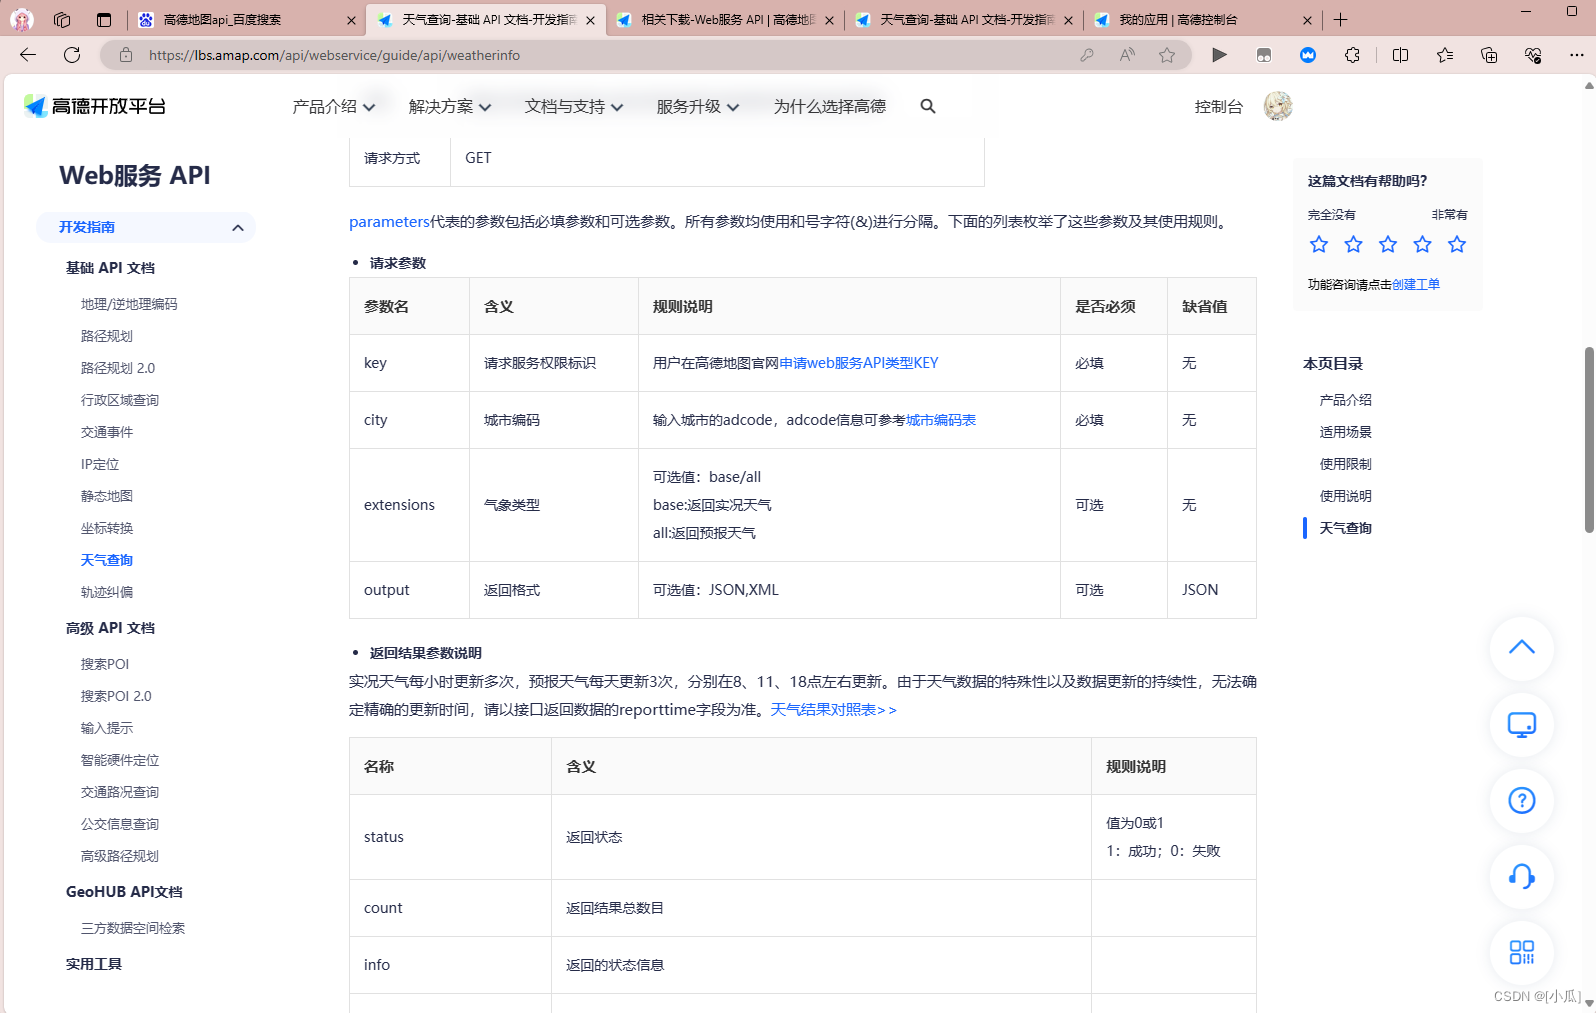
使用文档里面的参数进行简单查询
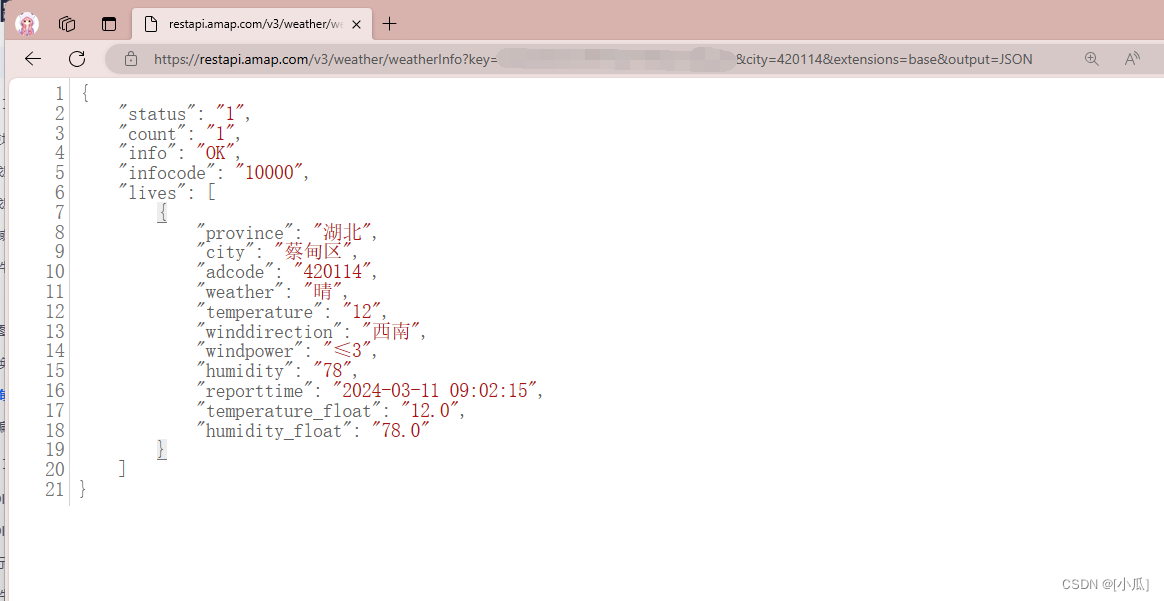
https://restapi.amap.com/v3/weather/weatherInfo?key=自己的key&city=城市的编码&extensions=查询的类型&output=返回的格式
- 查询结果
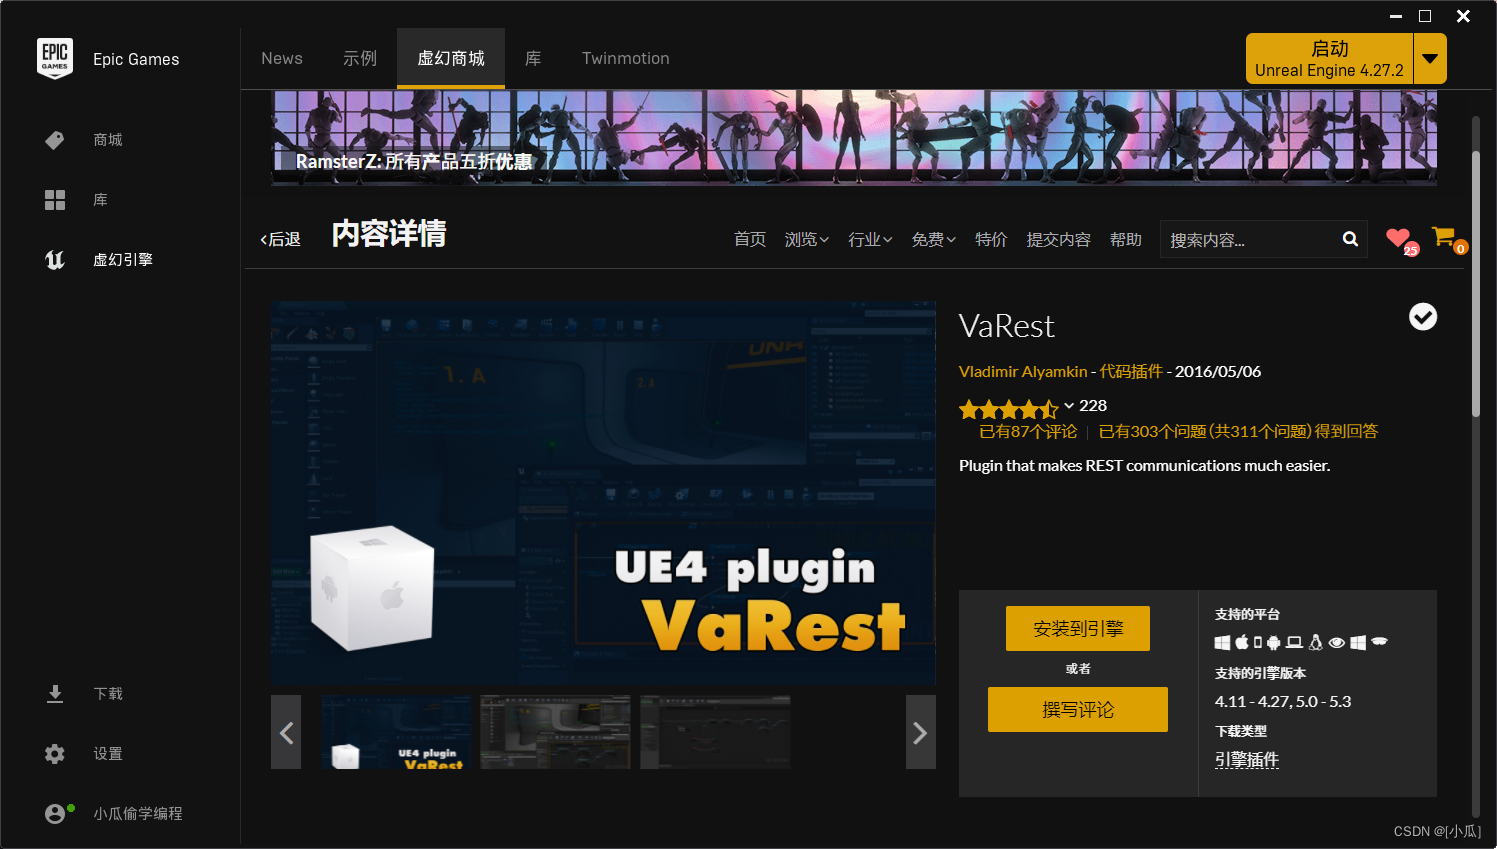
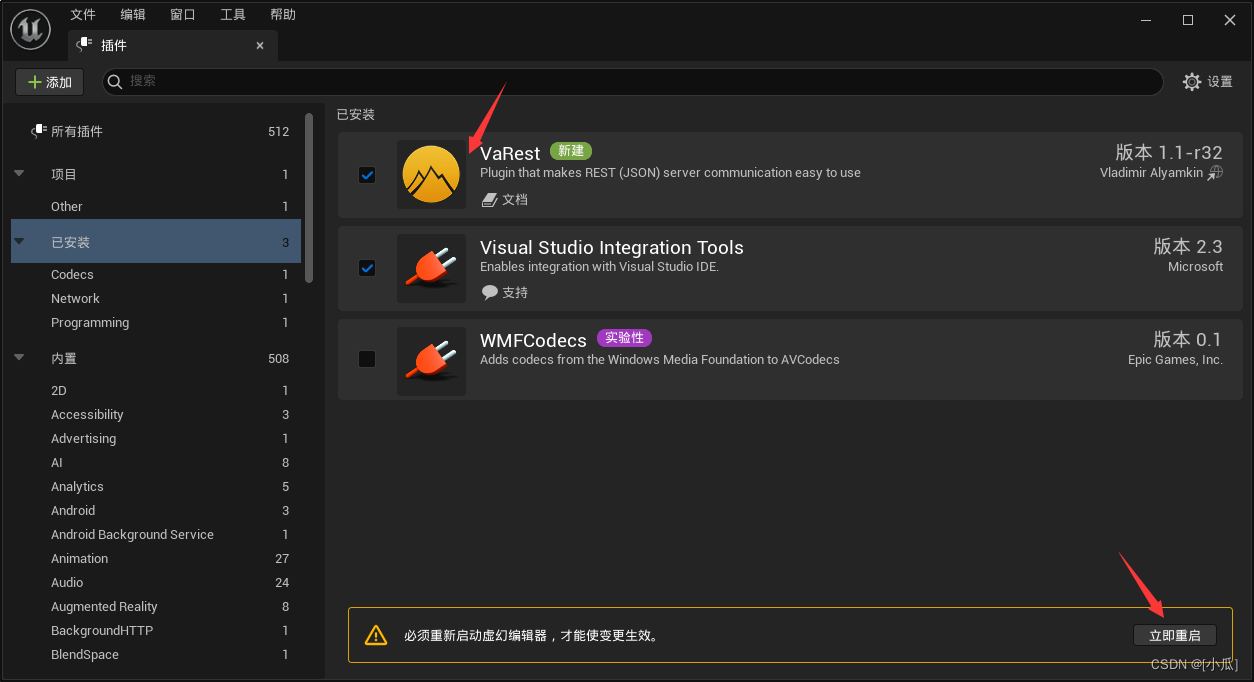
VaRest安装
- VaRest可以解析网络与本地的JSON文件的插件
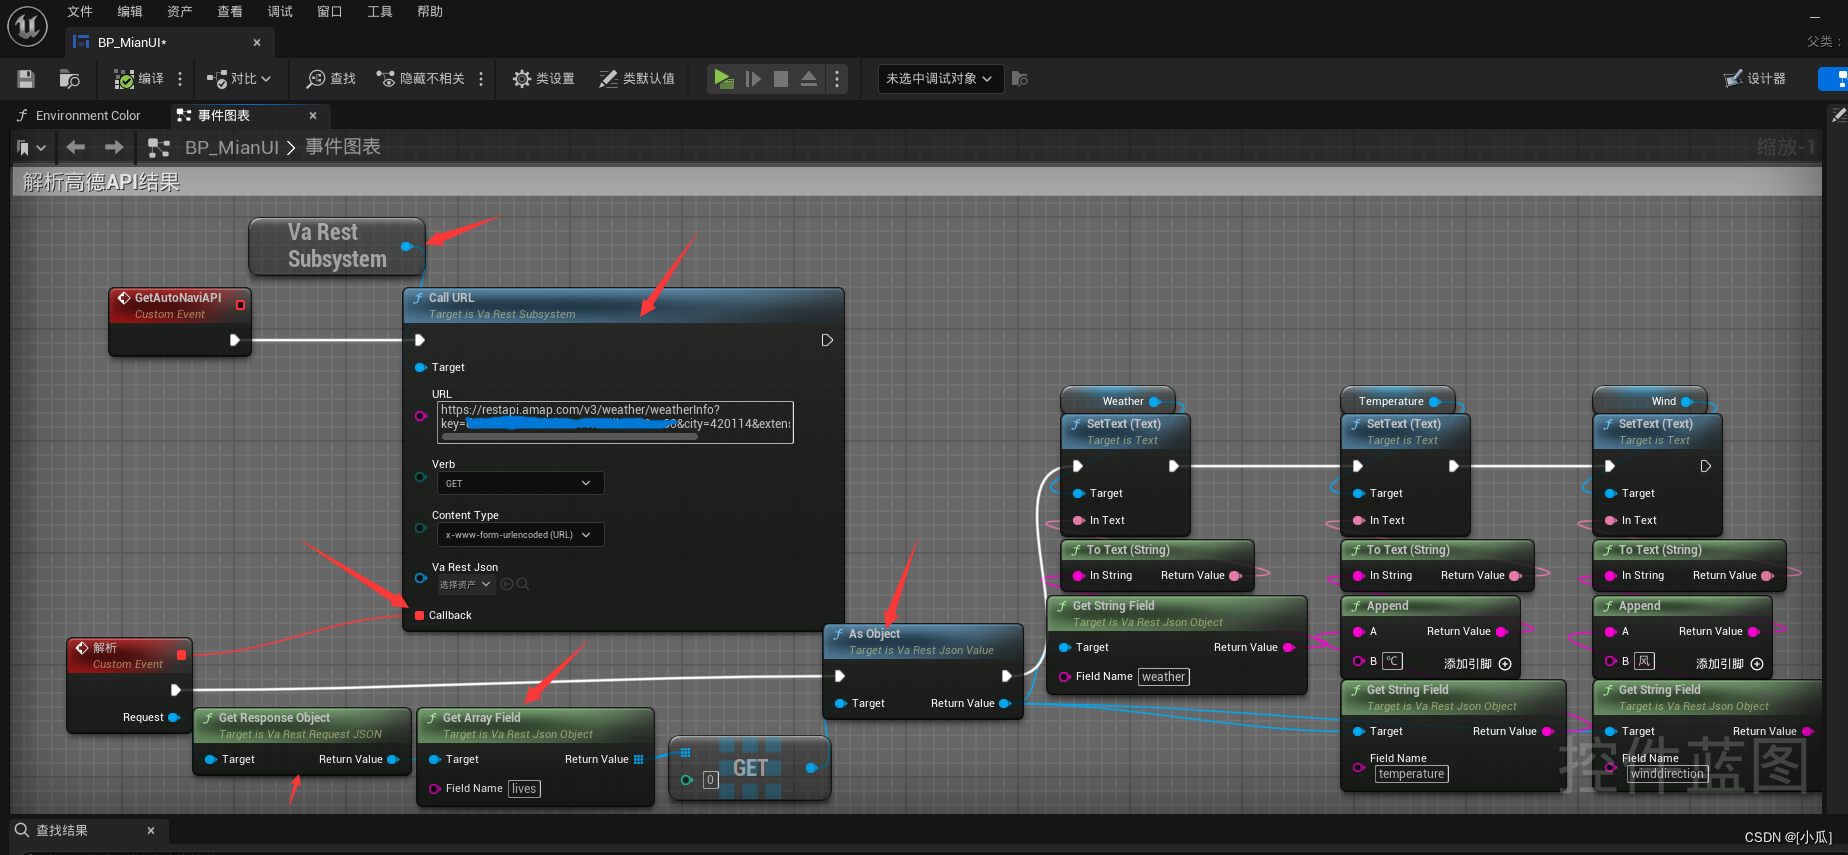
获取高德地图API结果解析
-
解析JSON文件设置到UMG上
-
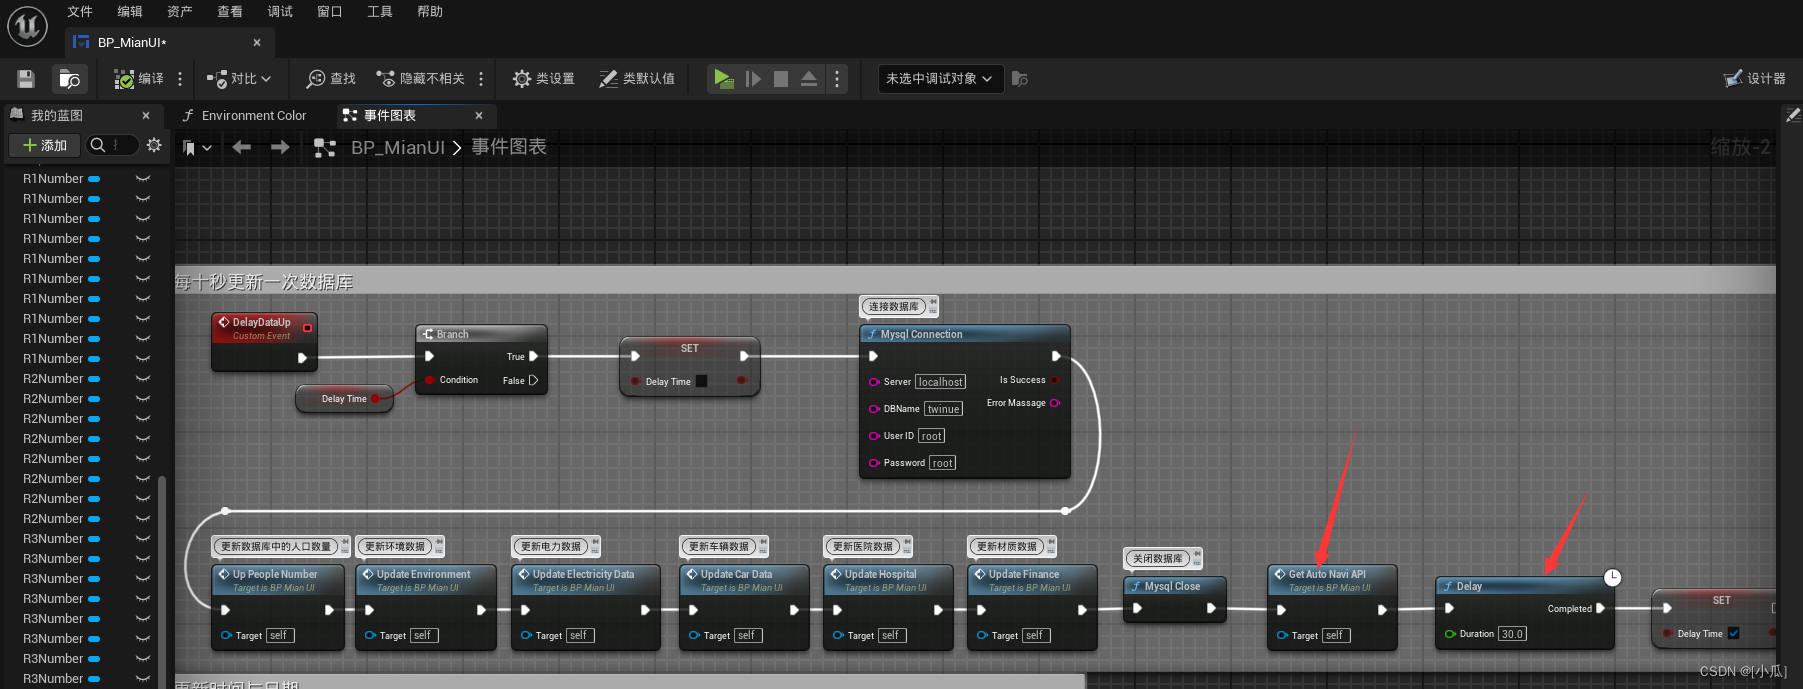
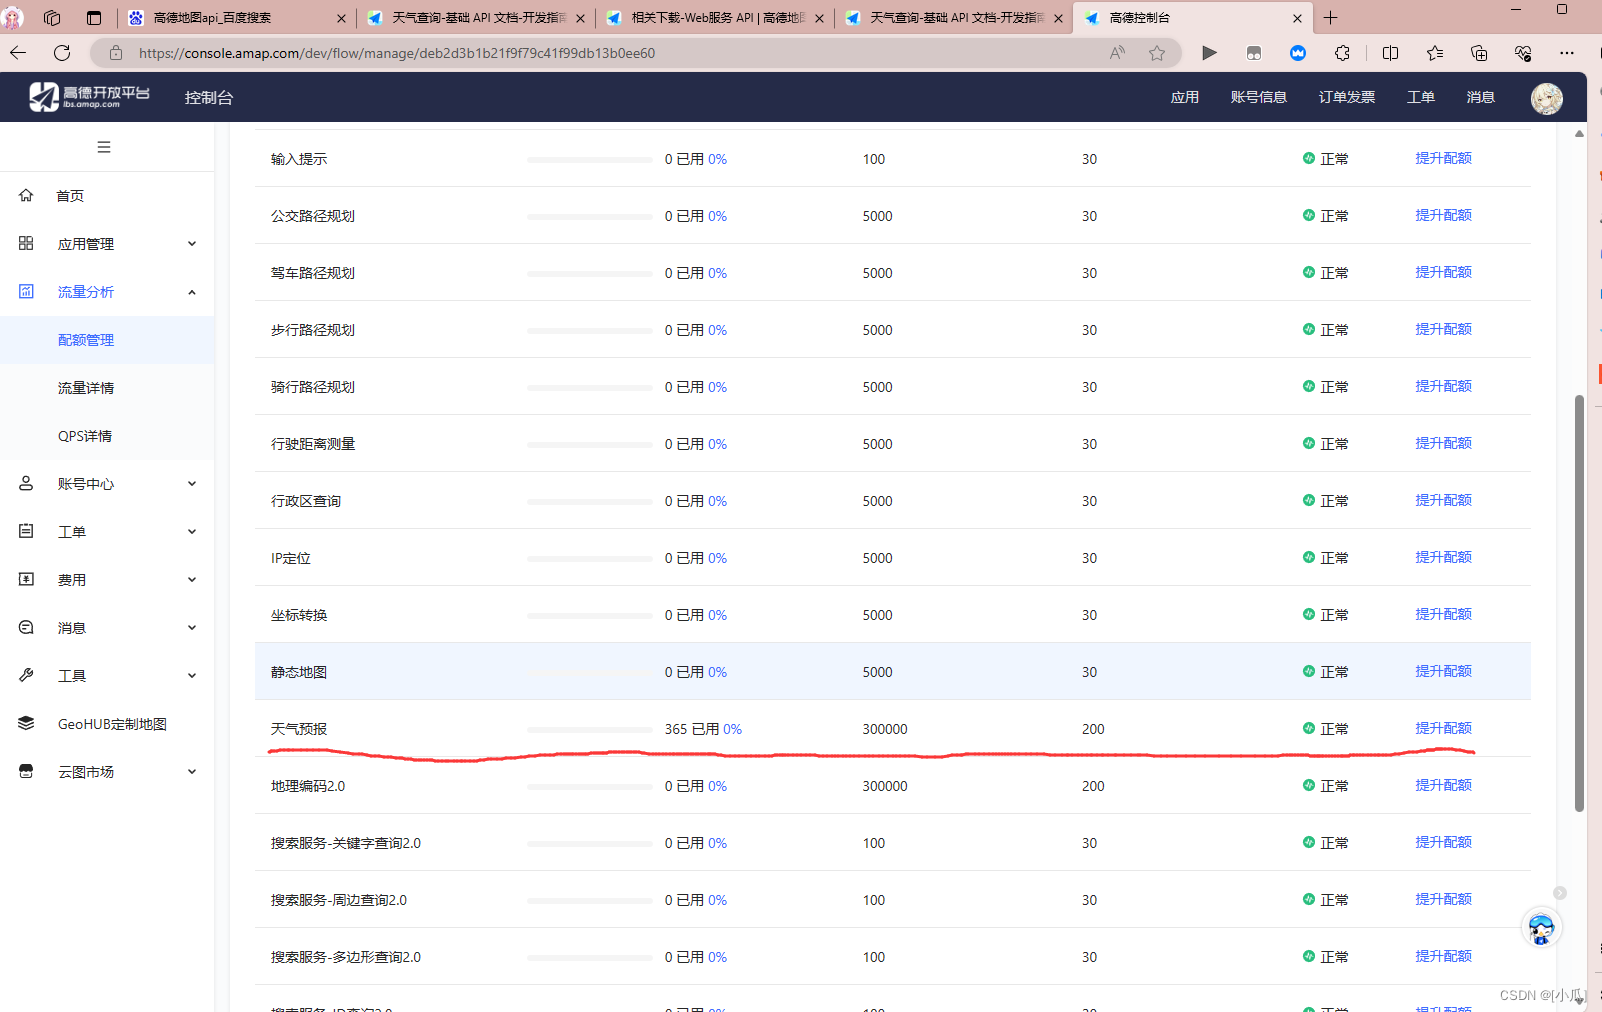
因为高德地图的API查询是有配额的,建议是延迟大一些进行查询,这里制作测试所以就三十秒查询一次
-
运行结果

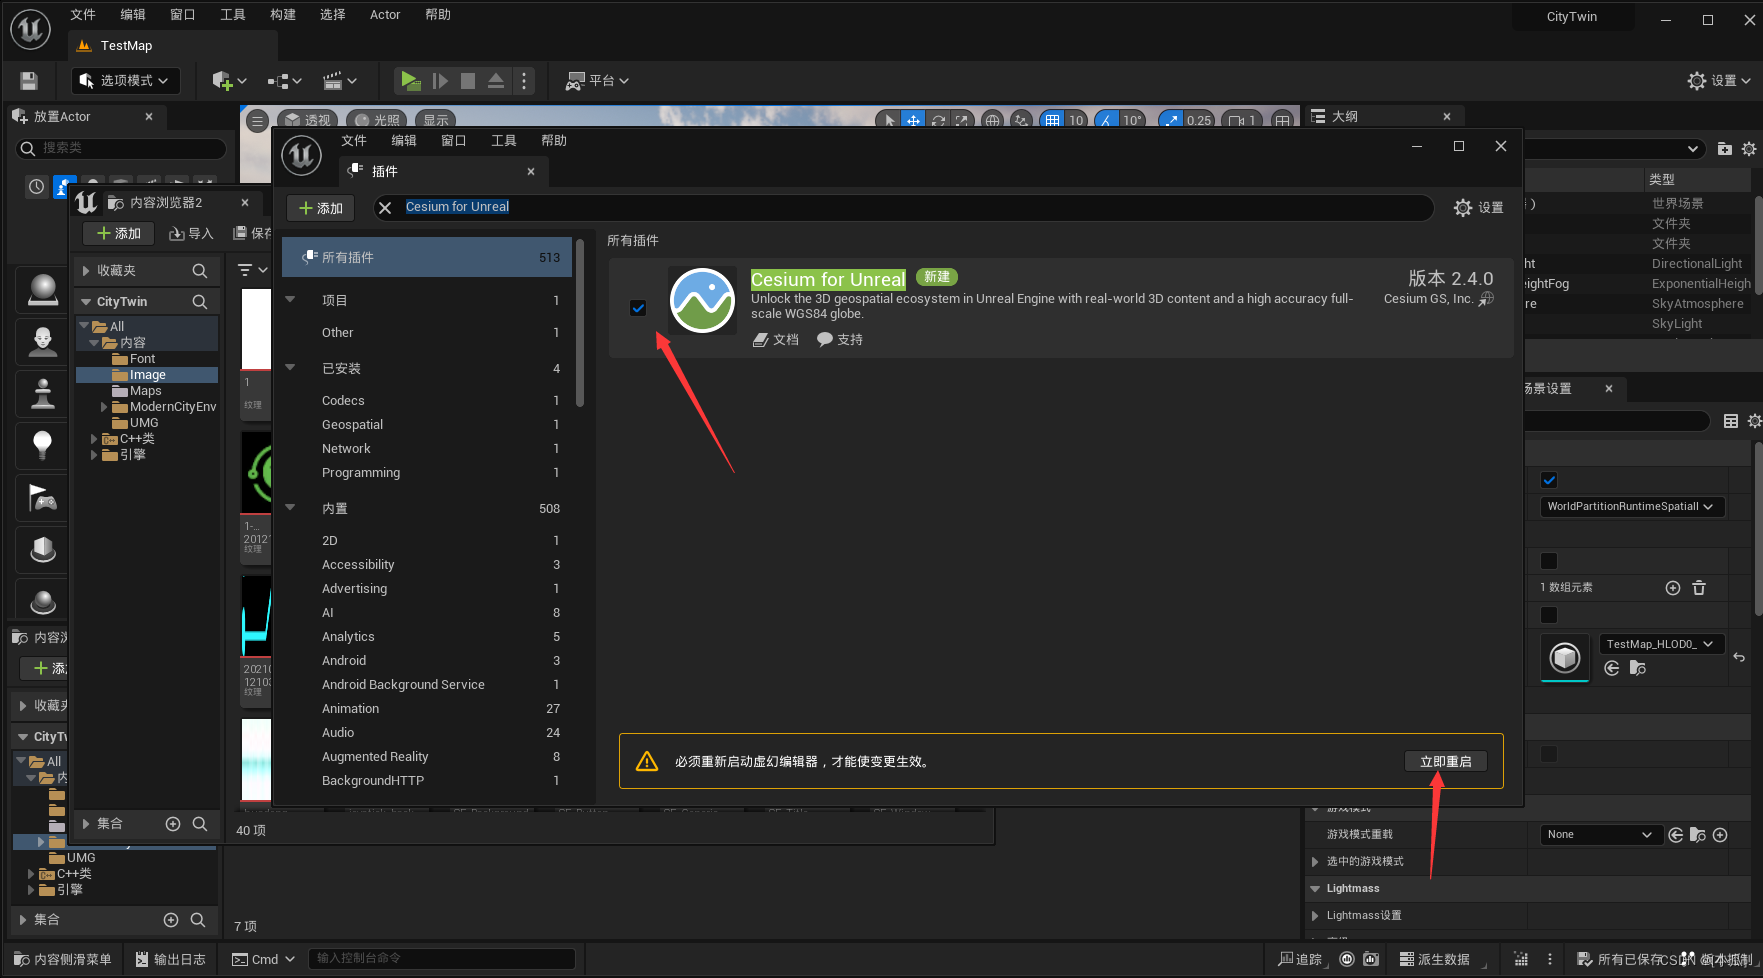
使用Cesium获取真是世界地形数据
-
下载Cesium for Unreal插件

-
定位纬度到自己想去的位置

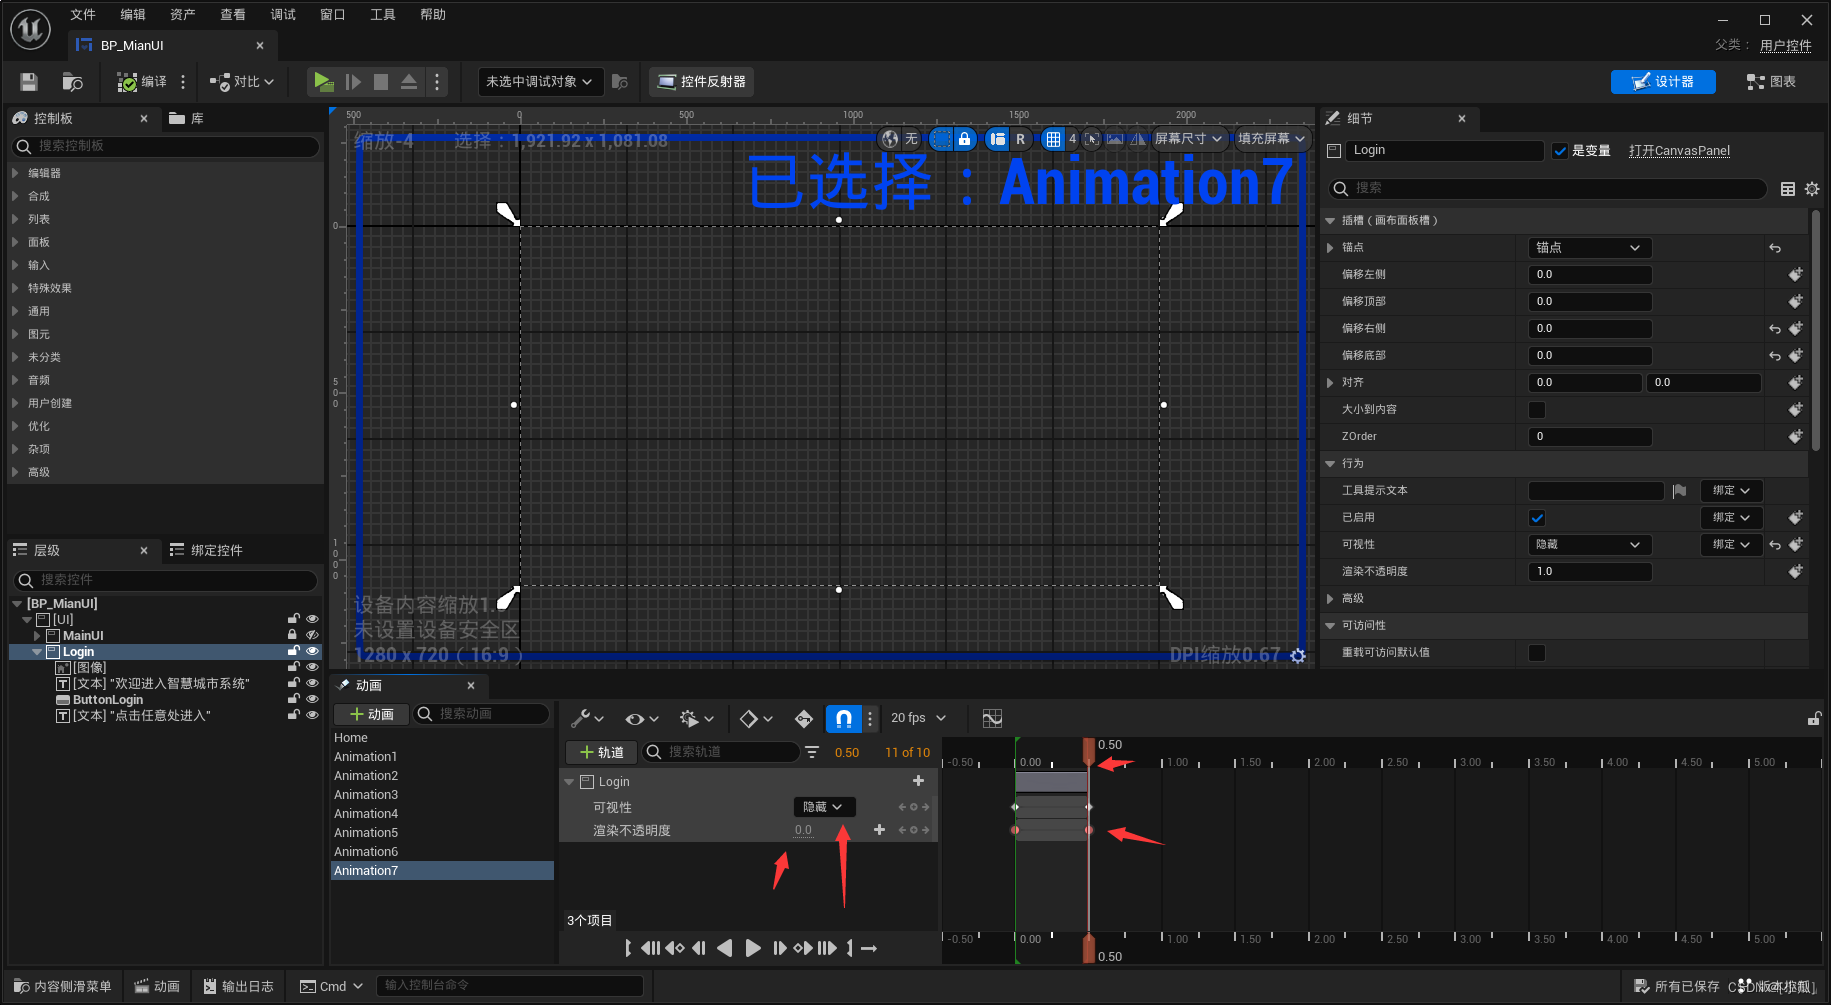
登录页面UI制作
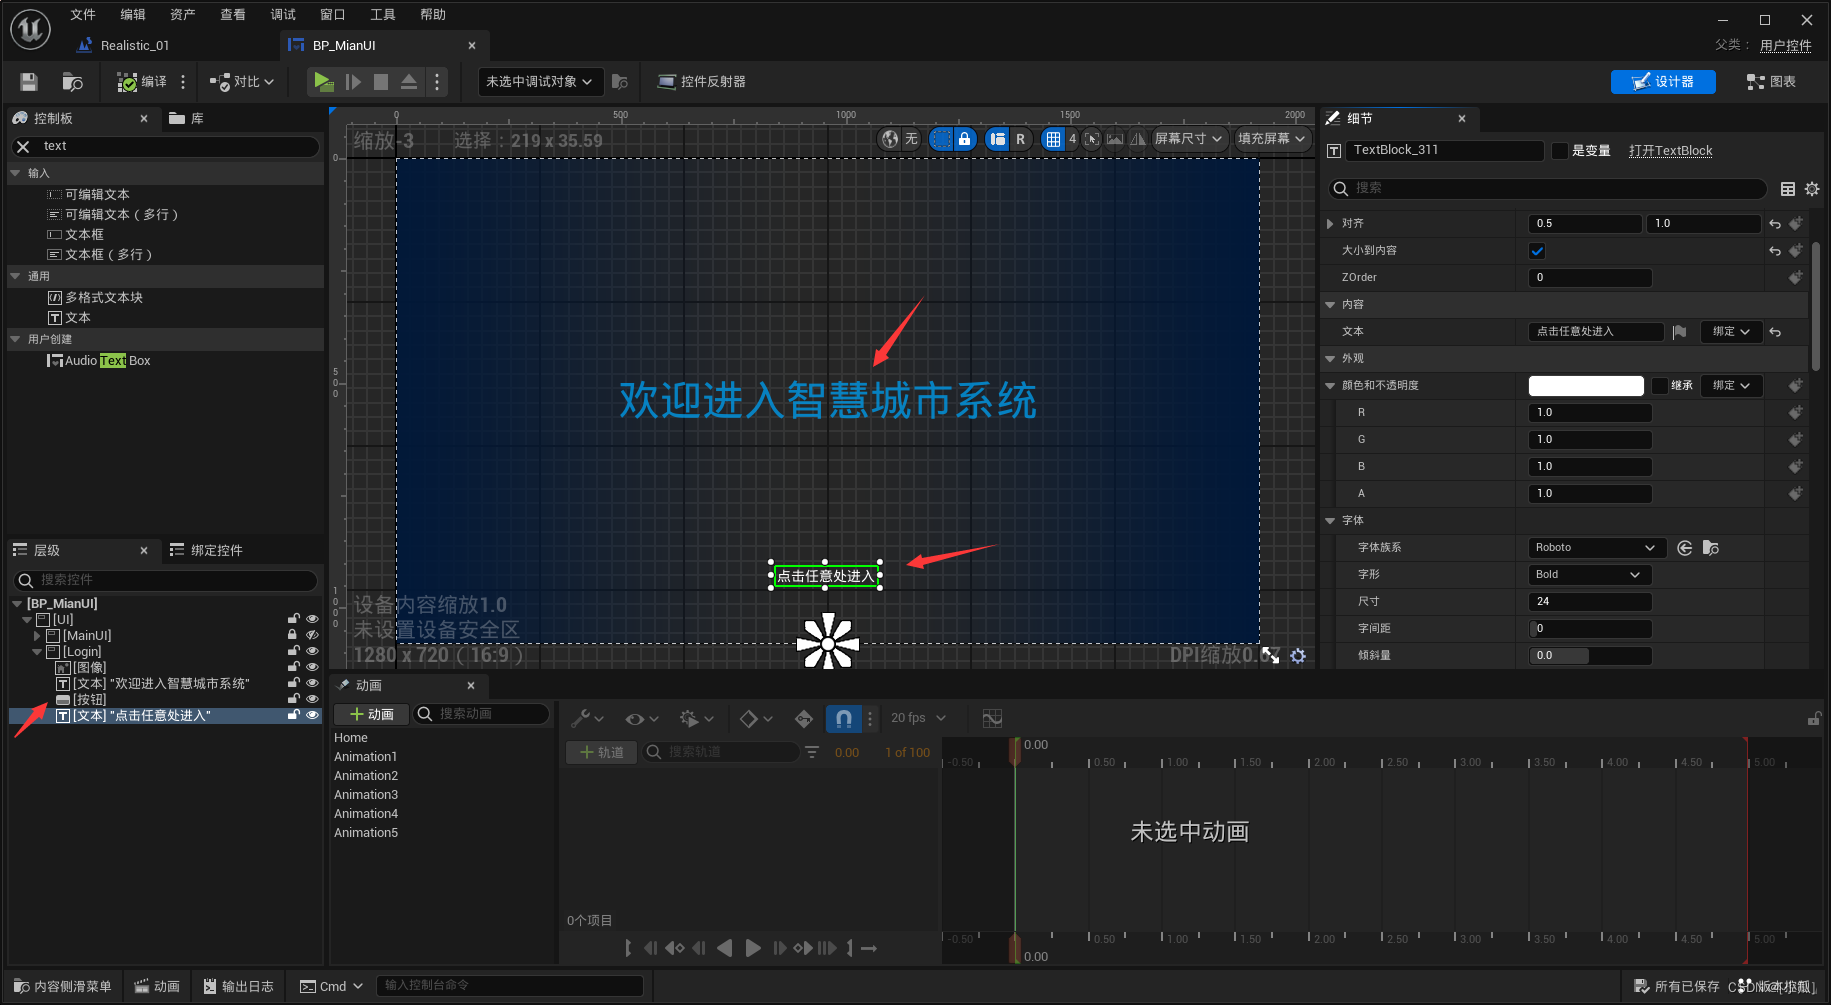
- 设计思路:当点击任意处,进入系统,动画消除这些文字描述,然后隐藏这个UI界面
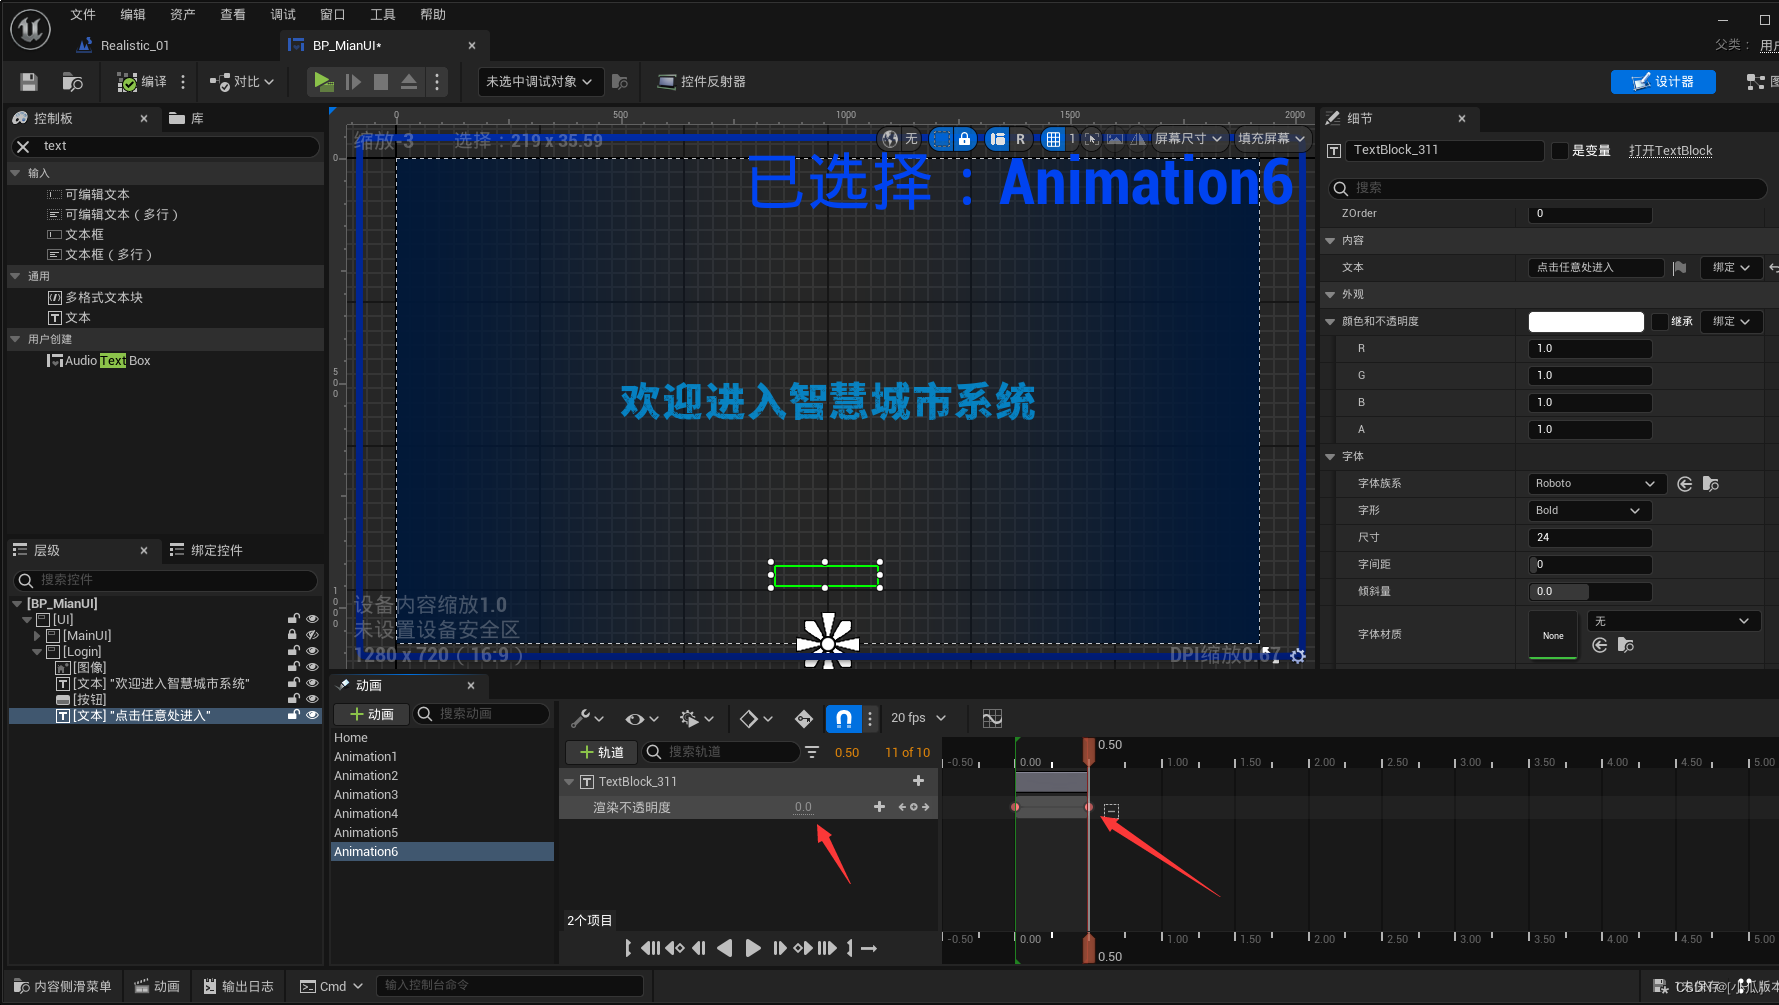
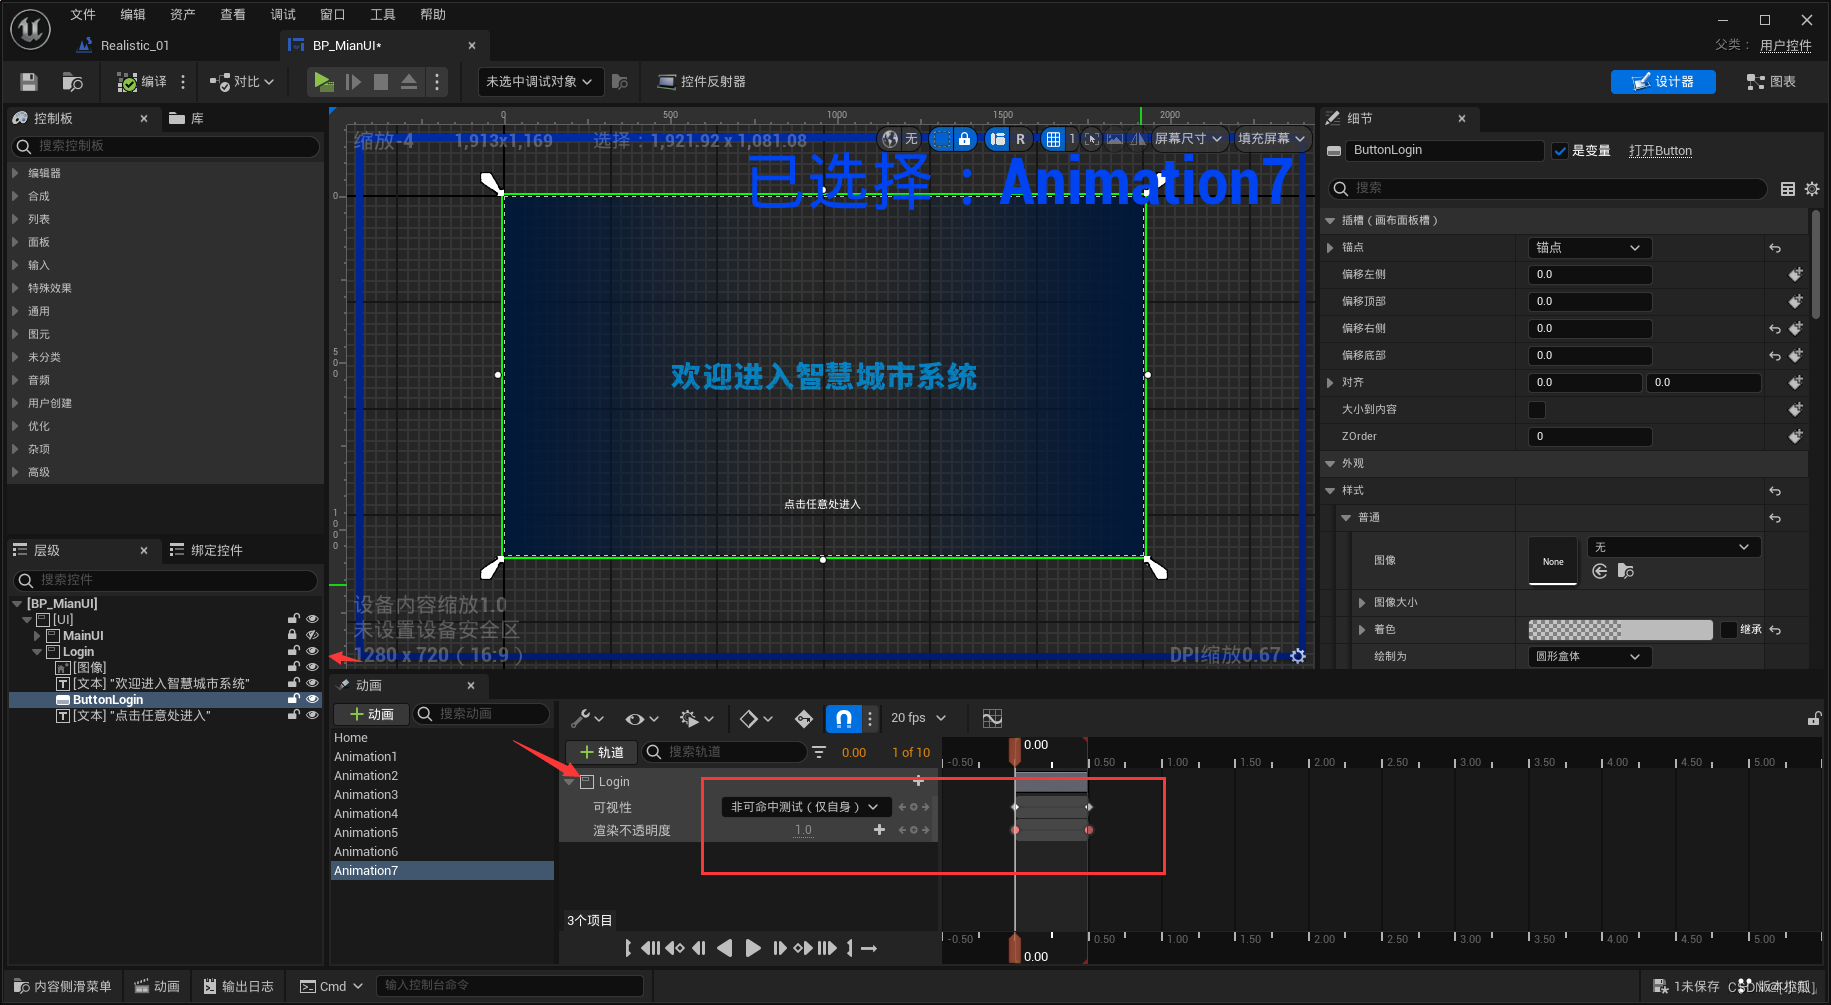

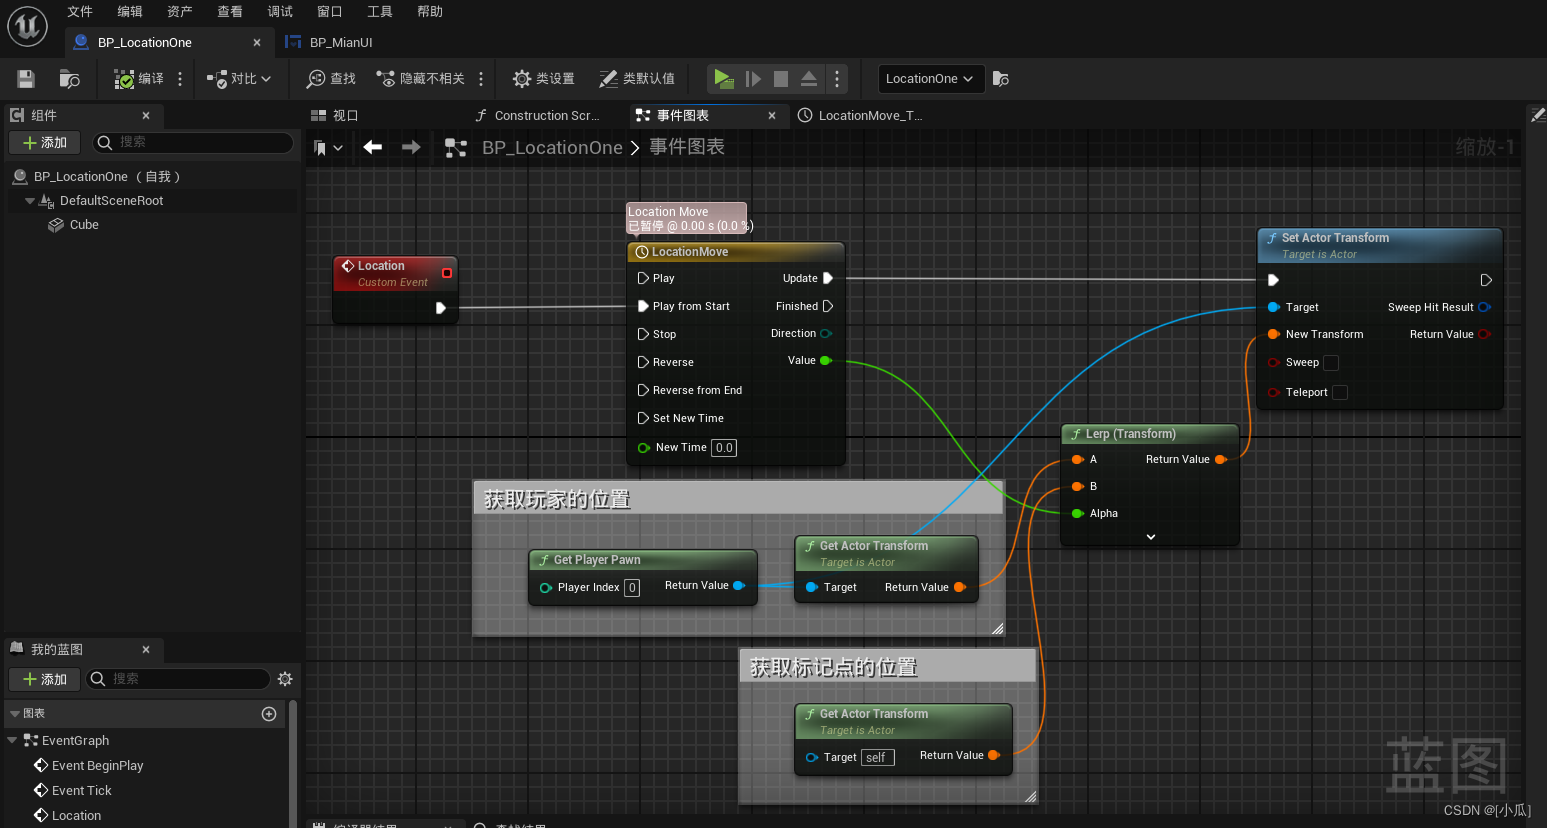
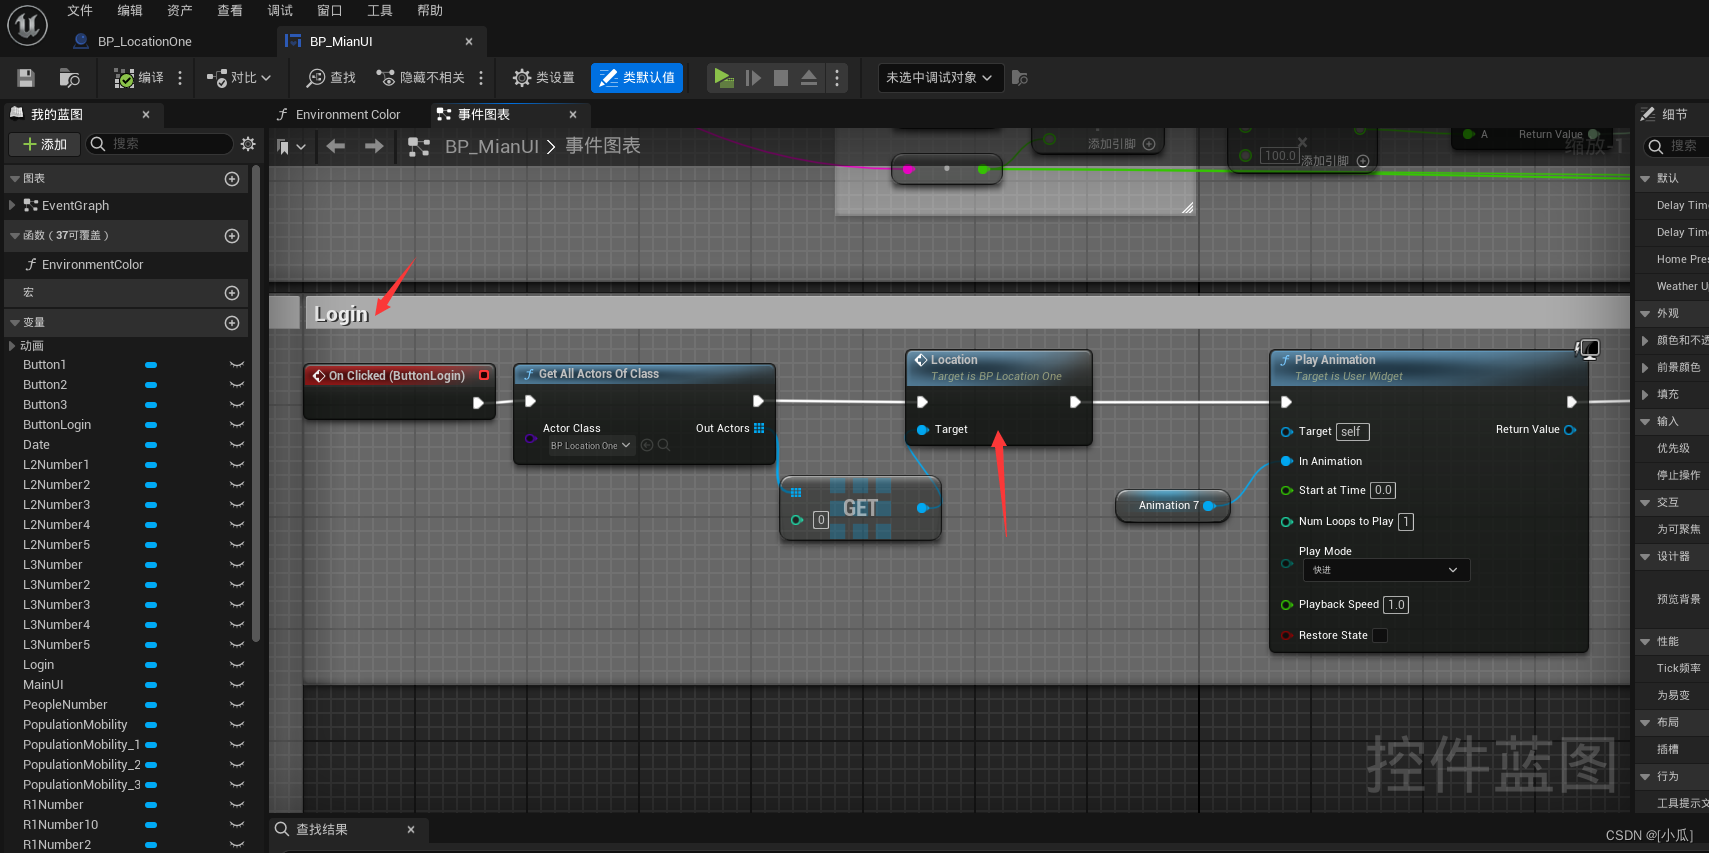
制作登录动画
- 创建一个Actor蓝图来做标点,设置出生点,动画思路,点击开始进入系统,画面迅速切换到Actor蓝图的点位来
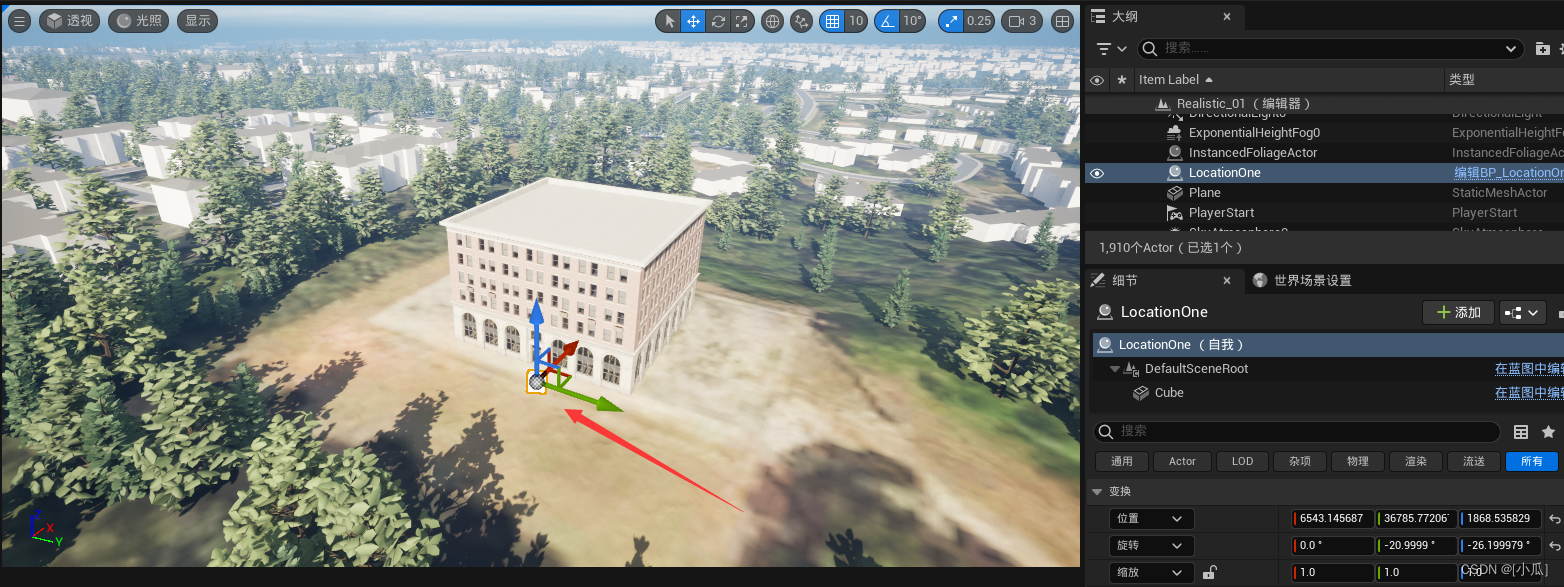
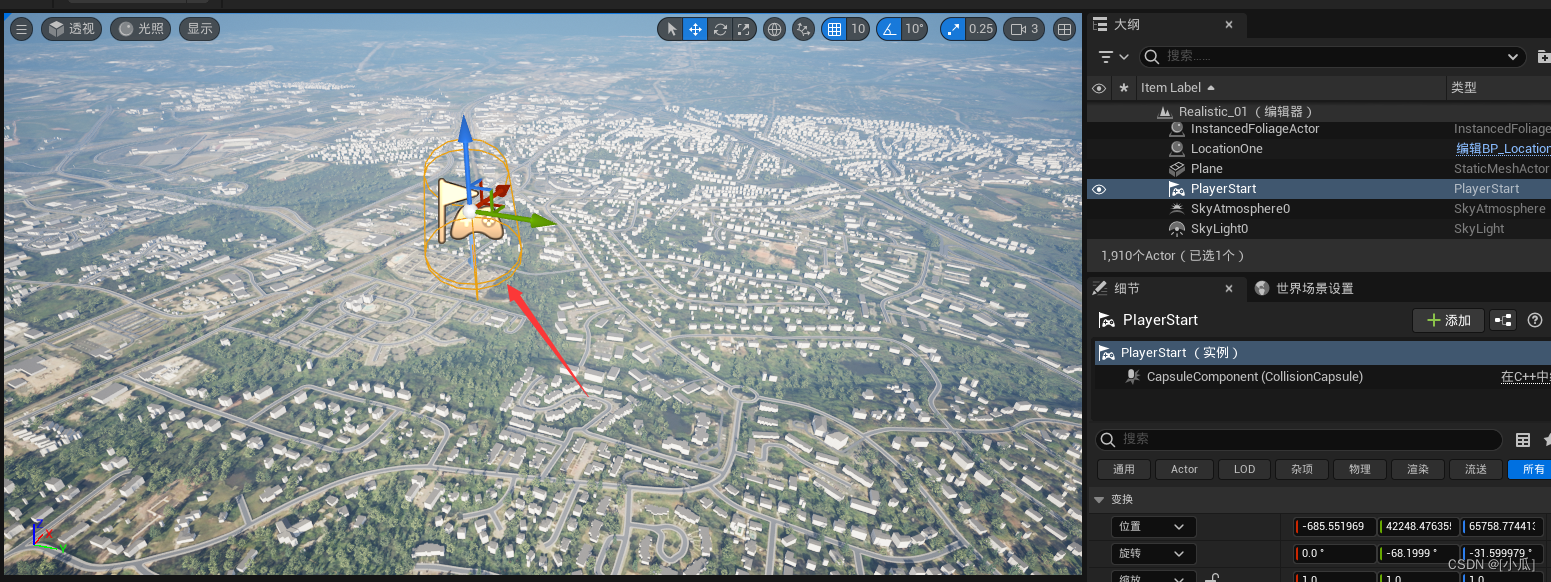
- 在Actor蓝图中进行逻辑抒写
- 运行结果