网站带后台免费下载网站怎么做才 吸引人
背景
有些时候我们需要修改opencv相关源码, 这里介绍怎么编译修改并调用修改后的库文件。
步骤
1、下载相关源码工具:
下载opencv4.8源码并解压
https://down.chinaz.com/soft/40730.htm
下载VS2019,社区版免费
https://visualstudio.microsoft.com/zh-hans/downloads/
下载Cmake:https://cmake.org/download/
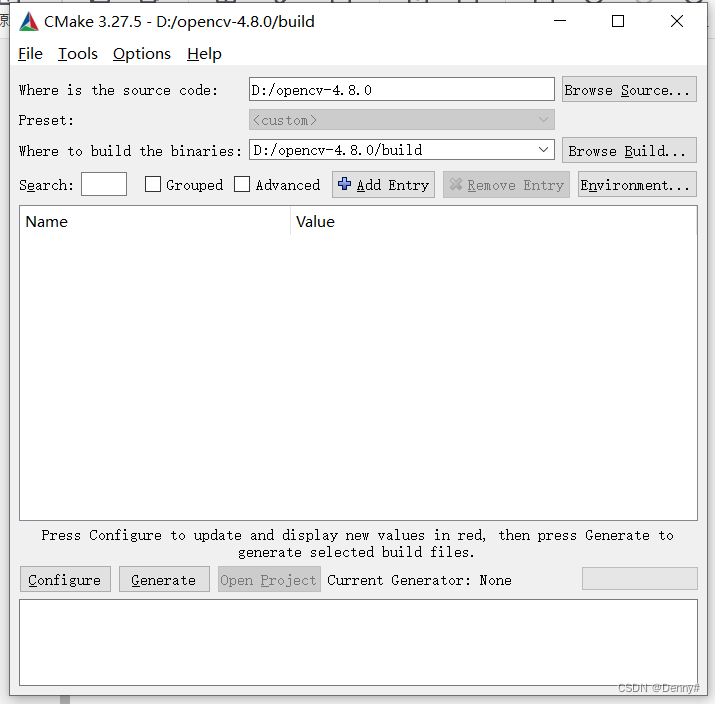
2、Cmake生成VS环境
选择源码位置,选择对应生成路径。点击Configure,等待运行完成后,再次点击Configure。完成后点击Generate
3、编译
在刚才的路径D:\opencv-4.8.0\build找到对应的sln工程文件,点击打开。
点击生成解决方案。
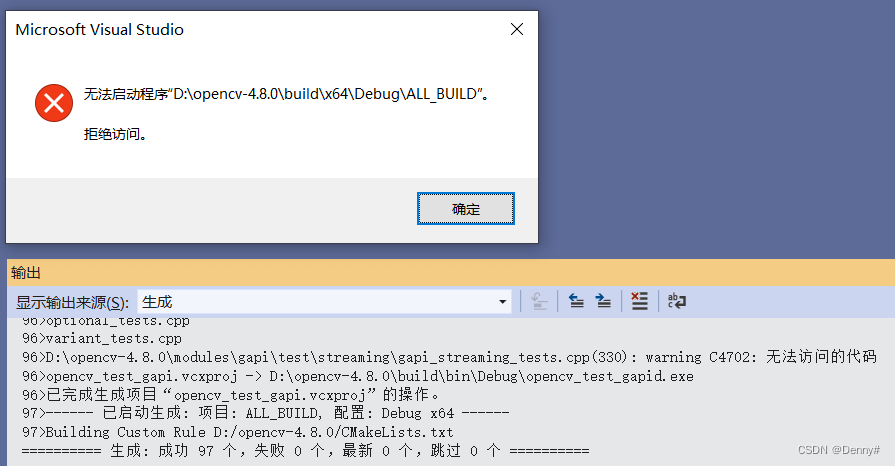
显示无法启动,这是因为当前启动项为ALL_BUILD,非可执行程序。
只要在目标文件夹能看到对应的生成库即可。D:\opencv-4.8.0\build\bin\Debug可以看到对应的dll文件
4、调用生成的库
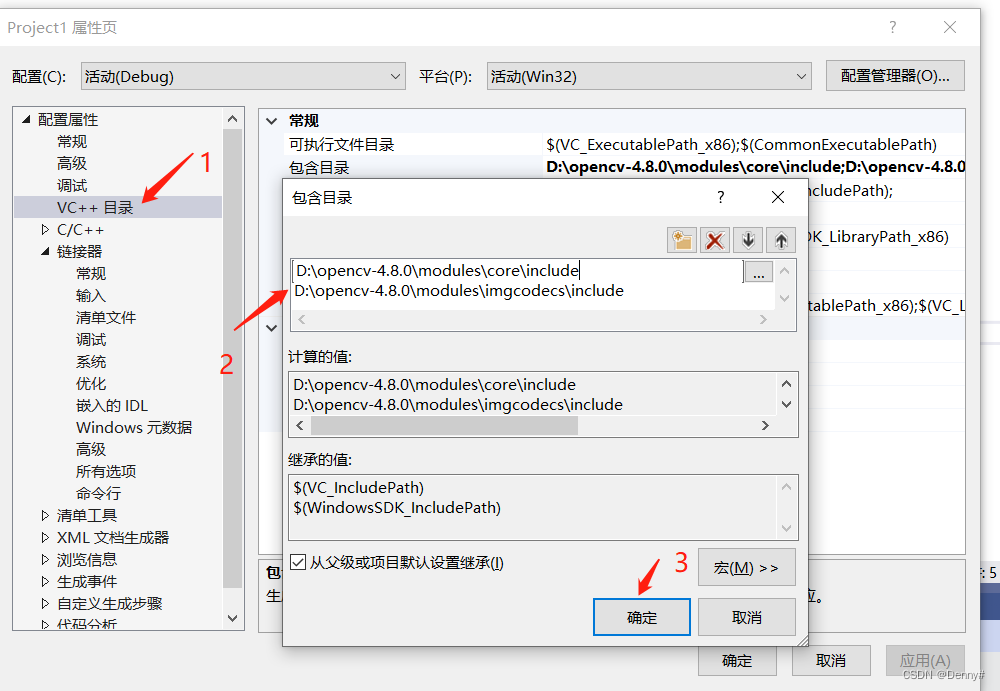
1)VS新建工程,注意先设置工程为X64,添加对应的包含目录,这里根据自己需要调用的库文件需求添加。
包含目录下面的库目录也输入一下:D:\opencv-4.8.0\build\lib\Debug
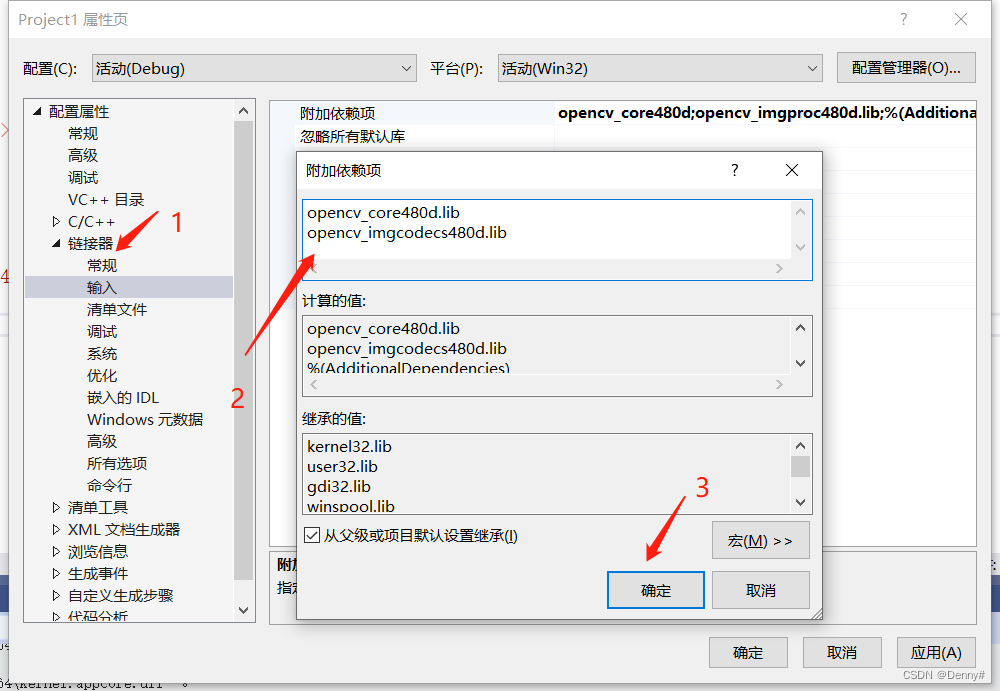
链接库也是按需添加。
2)编写相关测试代码
#include <iostream>
#include <opencv2/core.hpp>
#include <opencv2/imgcodecs.hpp>
using namespace std;
using namespace cv;int main() {Mat img;imread("D:\\opencv-4.8.0\\lena.jpeg");cout << "hello" << endl;return 0;
}
编译运行,得到对应的结果。
3)修改opencv源文件
为了确保调用的是我们刚生成的库文件,这里我们在opencv中修改下代码。
找到loadsave.cpp
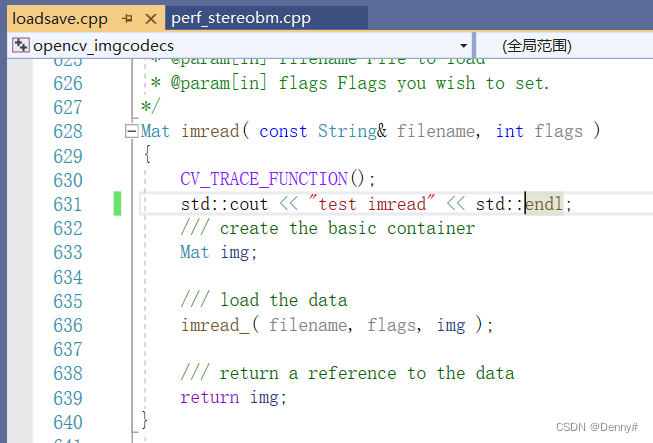
编译成功,库文件已更新
4)这里我们再执行下测试工程的代码。
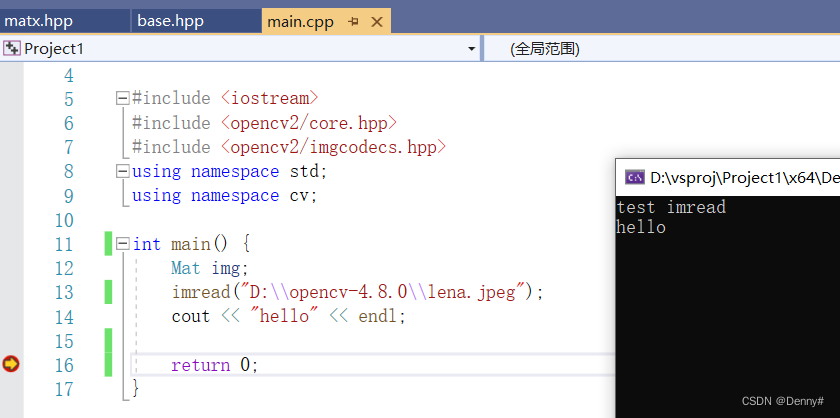
可以看到打印了我们刚刚添加的代码。